SDL and Dear ImGui, C++ GUI without Qt
Qt is certainly great, but there are other ways for creating cross-platform GUI, one of such ways being a combination of SDL and Dear ImGui.
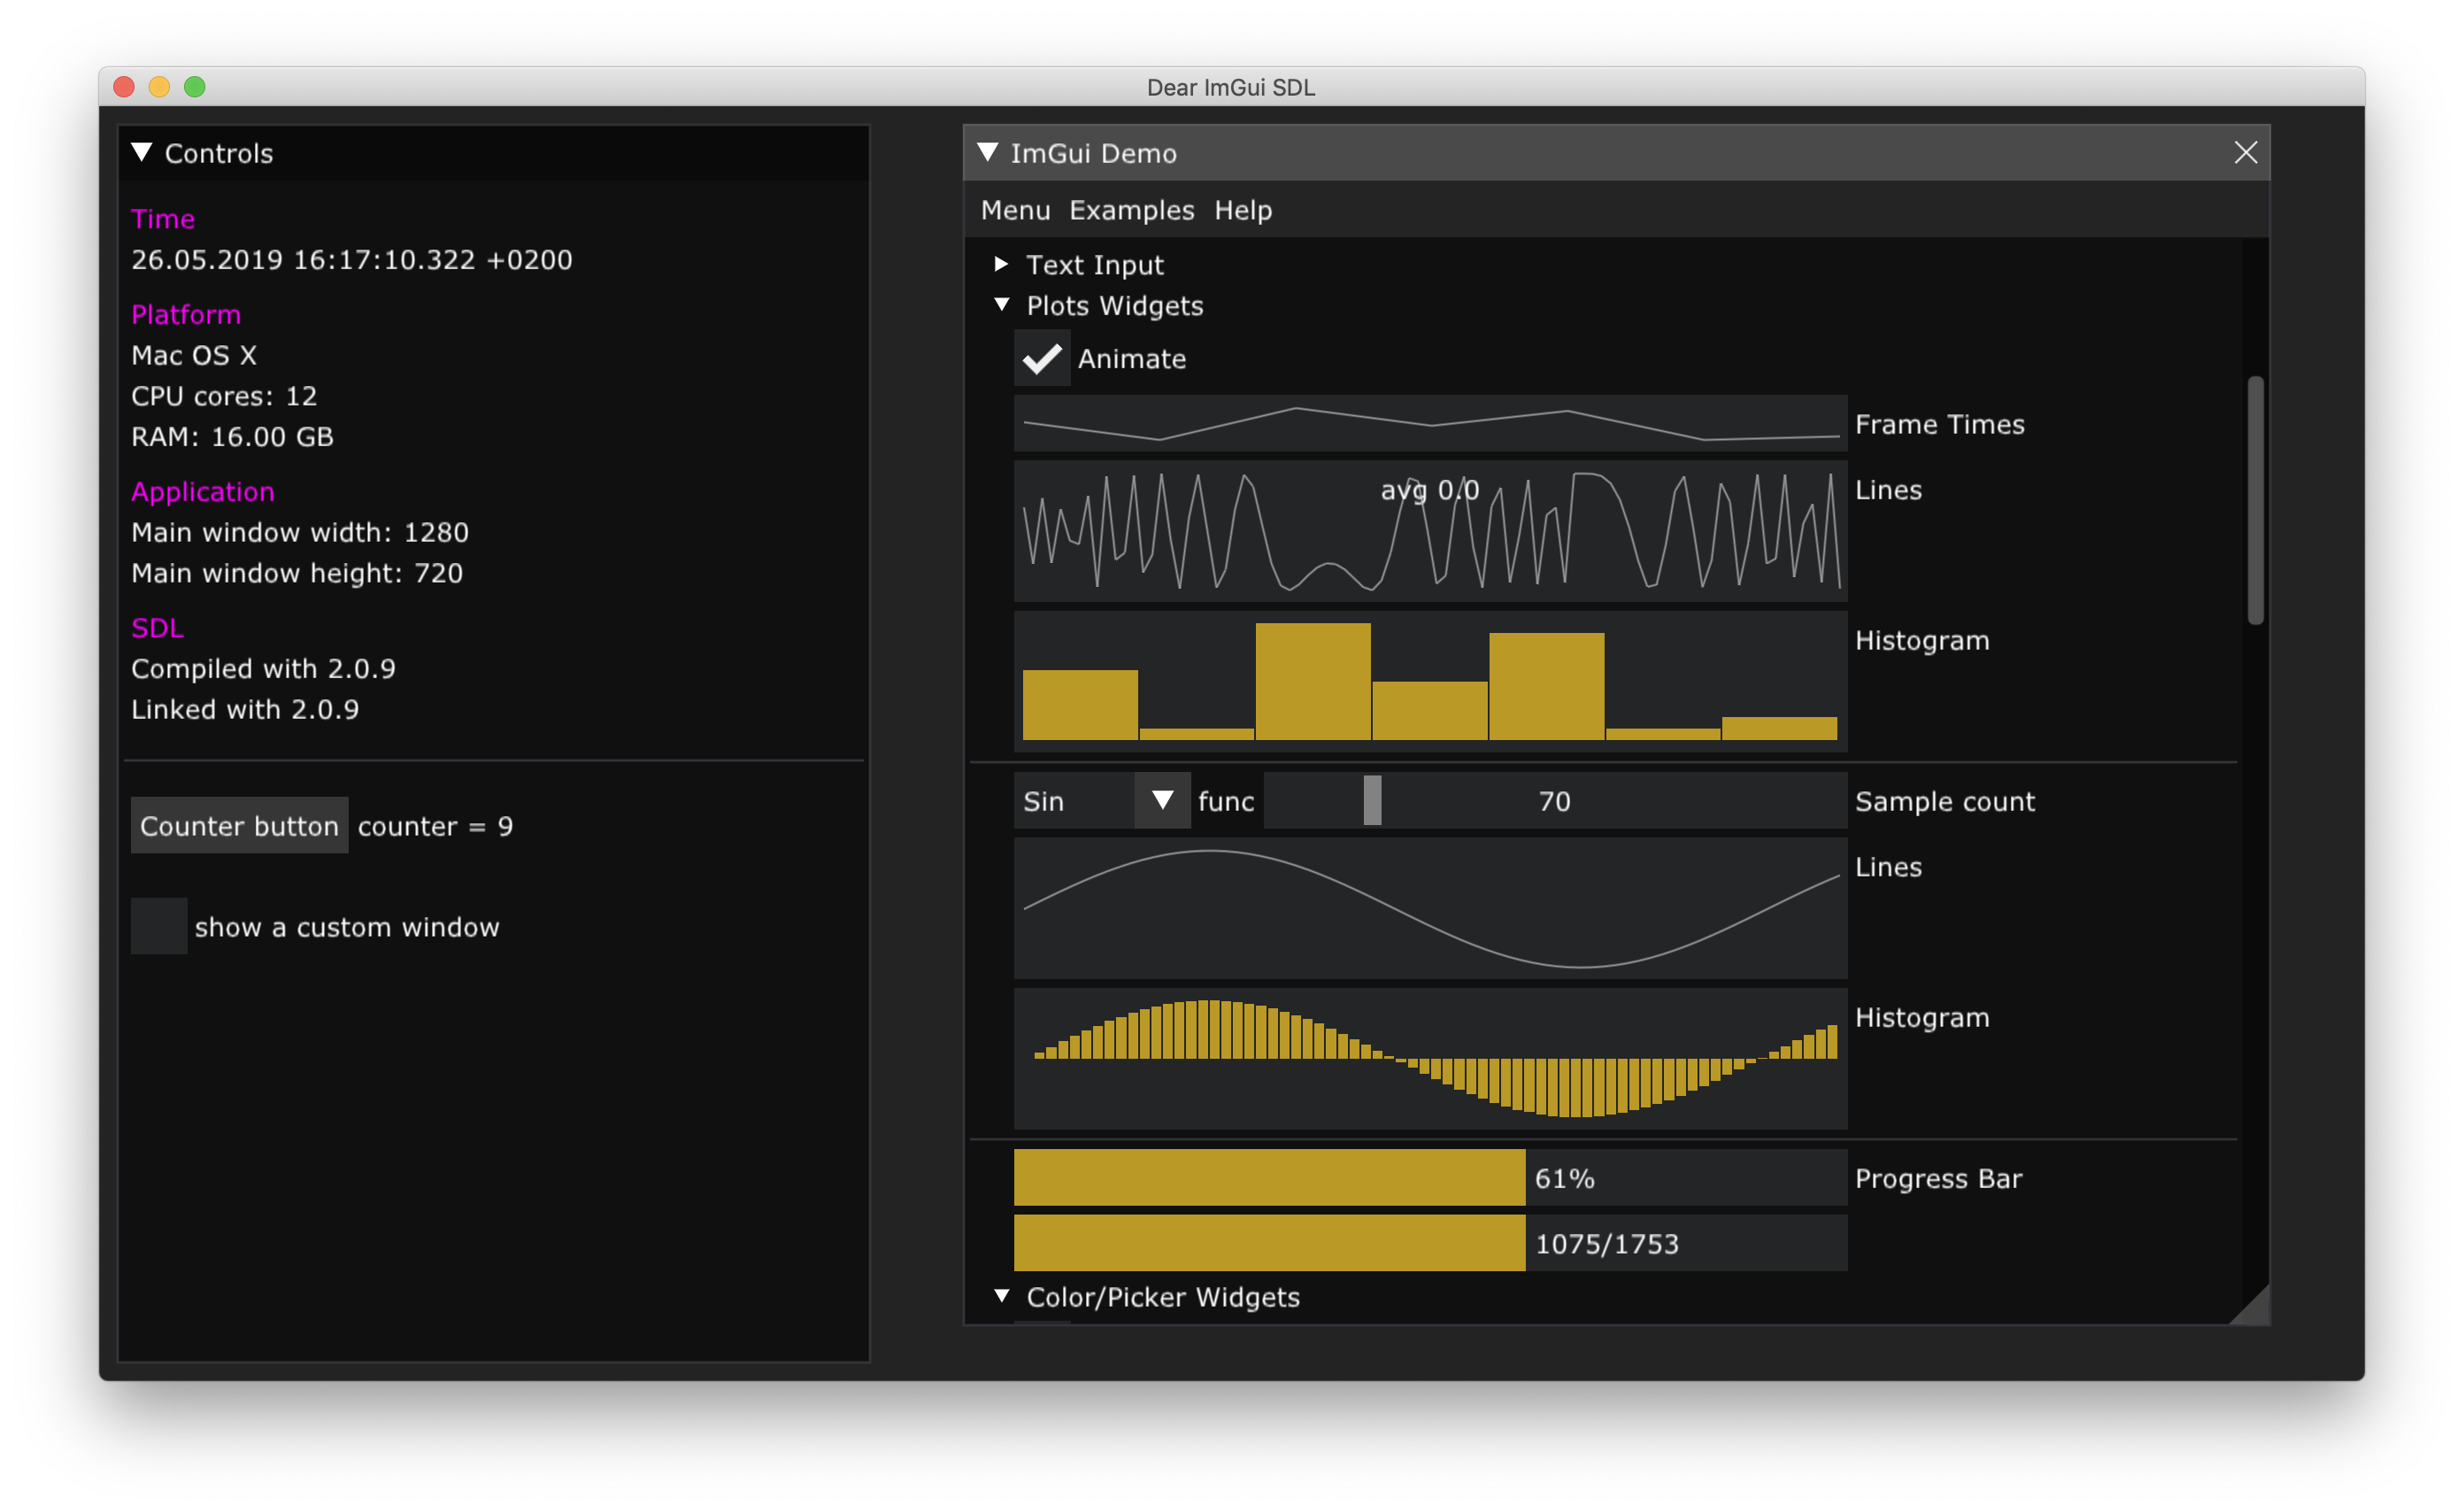
While, in my opinion, it barely can compete with Qt (especially Qt Quick) in terms of beauty and fancy, it is nevertheless a simple, lightweight and quite powerful “framework”.
I also continue learning CMake with Visual Studio Code, so that’s what I will be using for building the project.
Preparing CMakeLists.txt
Almost the most difficult and time consuming part of the whole thing was to make it all work with CMake. But that’s just me - still a total noob in CMake.
OpenGL
From lots of supported backends I decided to go with OpenGL.
CMake knows about it very well because adding it to CMakeLists.txt is very simple:
find_package(OpenGL REQUIRED)

# ...

target_link_libraries(${CMAKE_PROJECT_NAME} ${OPENGL_gl_LIBRARY})
glad
You might find amusing that OpenGL is actually in such a state that it is not so trivial to get the latest version of it. And you need to use a special OpenGL loading library for that, one of which is glad.
You can get it using a webservice. I have no idea what difference do all these options make here, so I just checked the maximum OpenGL version and added all the extensions:
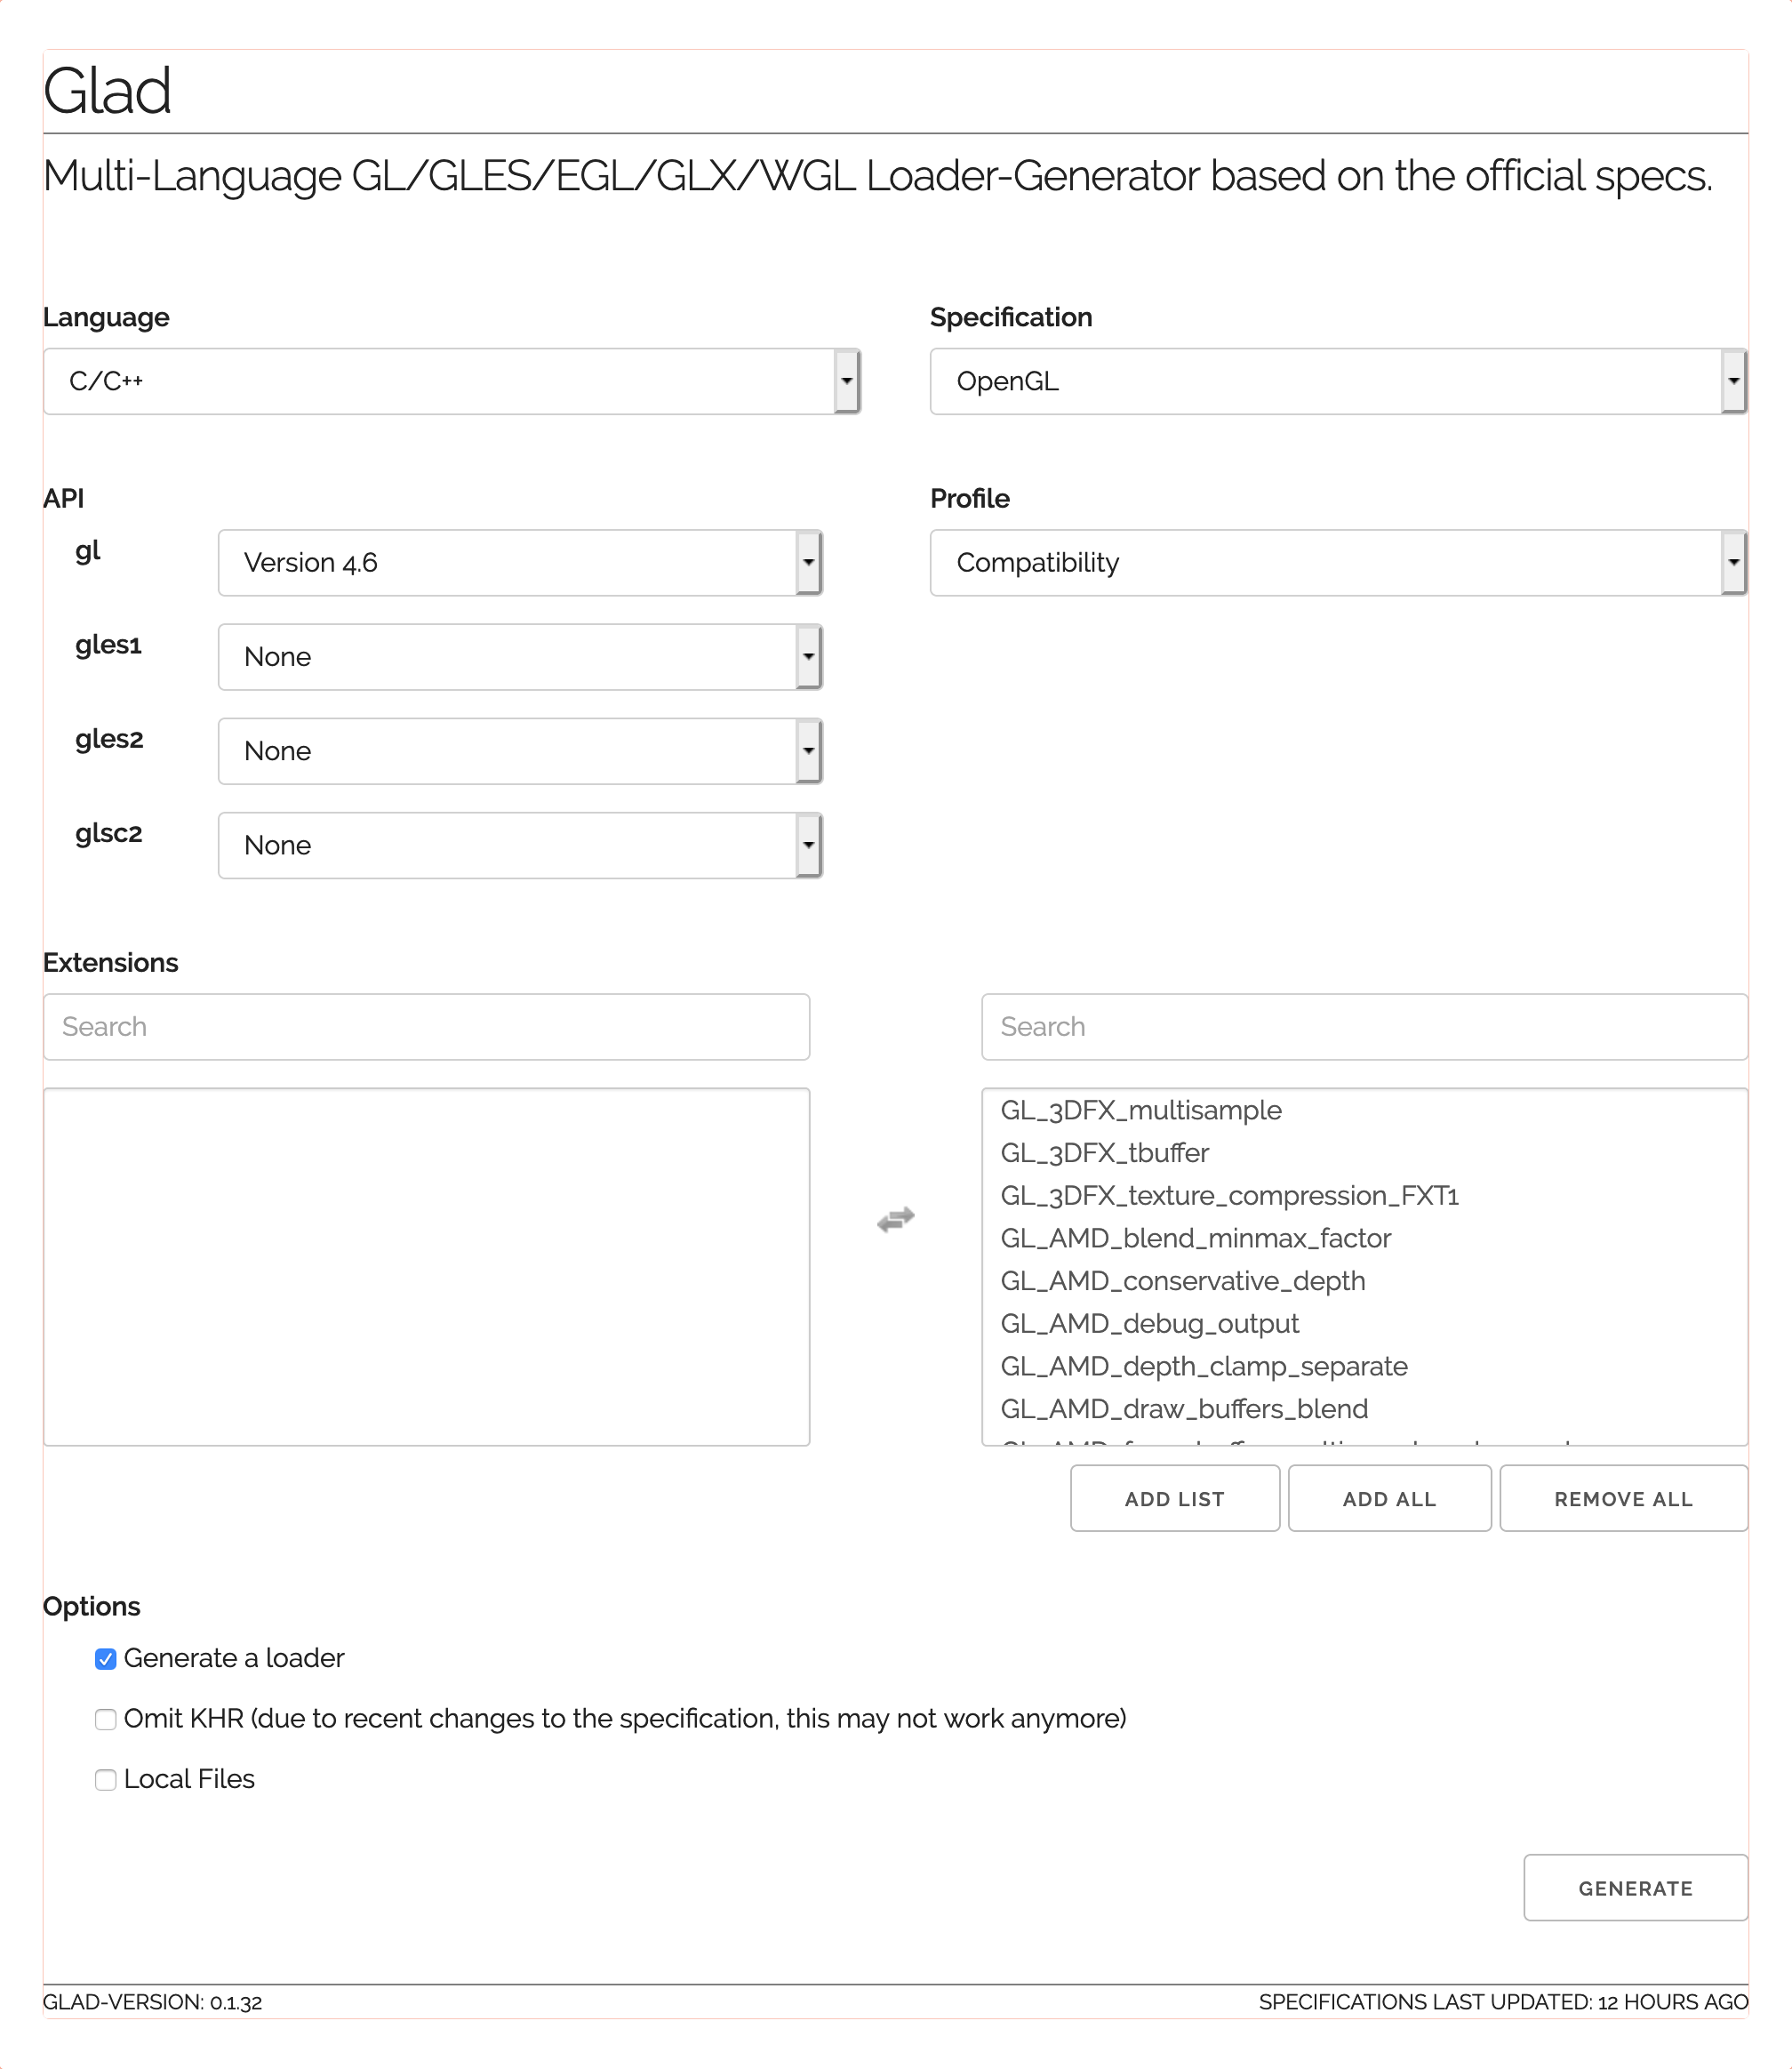
Generate the files, download glad.zip, unpack it and add the library to CMakeLists.txt:
add_library("glad" "/path/to/glad/src/glad.c")

include_directories(
    "/path/to/glad/include"
    )

# ...

target_link_libraries(${CMAKE_PROJECT_NAME}
    "glad"
    )
SDL
There are several solutions referring to multiple variations of FindSDL2.cmake. As usual, none of those were useful, and what actually worked for me was simply specifying where the library and its headers are.
On Windows
On Windows I have SDL library here: e:/tools/sdl/:
.
├── BUGS.txt
├── COPYING.txt
├── README-SDL.txt
├── README.txt
├── WhatsNew.txt
├── docs
│   ├── README-android.md
│   ├── ...
│   └── doxyfile
├── include
│   ├── SDL.h
│   ├── ...
│   └── close_code.h
├── lib
│   ├── x64
│   │   ├── SDL2.dll
│   │   ├── SDL2.lib
│   │   ├── SDL2main.lib
│   │   └── SDL2test.lib
│   └── x86
│       ├── SDL2.dll
│       ├── SDL2.lib
│       ├── SDL2main.lib
│       └── SDL2test.lib
└── sdl2-config.cmake
So, here’s what I added to CMakeLists.txt:
# SDL library
find_library(SDL SDL2 PATHS e:/tools/sdl/lib/x64)
# that is needed on Windows for main function
find_library(SDLmain SDL2main PATHS e:/tools/sdl/lib/x64)
# headers
include_directories(
    "e:/tools/sdl/include"
    )

# ...

add_executable(${CMAKE_PROJECT_NAME} WIN32 ${sources})
target_link_libraries(${CMAKE_PROJECT_NAME} ${SDL} ${SDLmain})
A better solution would be to put SDL into lib folder in your project directory - and that’s what I did on Mac OS.
On Mac OS
On Mac OS it was less trivial as there SDL comes as a framework:
.
└── SDL2.framework
    ├── Headers -> Versions/Current/Headers
    ├── Resources -> Versions/Current/Resources
    ├── SDL2 -> Versions/Current/SDL2
    └── Versions
        ├── A
        │   ├── Headers
        │   │   ├── SDL.h
        │   │   ├── ...
        │   │   └── close_code.h
        │   ├── Resources
        │   │   └── Info.plist
        │   └── SDL2
        └── Current -> A
However, the principle is the same:
# SDL library
find_library(SDL SDL2 PATHS "${CMAKE_SOURCE_DIR}/lib")
# headers
include_directories(
    "${CMAKE_SOURCE_DIR}/lib/SDL2.framework/Versions/Current/Headers"
    )

# ...

add_executable(${CMAKE_PROJECT_NAME} ${sources})
target_link_libraries(${CMAKE_PROJECT_NAME} ${SDL})
Unlike Windows, there is no need to link with SDL2main library on Mac OS.
On Linux
Check if you actually have SDL in the system:
apt install libsdl2-devIf you do, then libraries discovery on Linux is organized so well that you can just do this:
find_package(SDL2 REQUIRED)
include_directories(${SDL2_INCLUDE_DIRS})

# ...

add_executable(${CMAKE_PROJECT_NAME} ${sources})
target_link_libraries(${CMAKE_PROJECT_NAME} ${SDL2_LIBRARIES})
But finding the right variables took me a good couple of hours. It is amazing how such fucking simple things are so motherfucking complicated and hard to find.
Dear ImGui
Unlike other frameworks/libraries, Dear ImGui comes in a form of plain source files which you need to include into your project:
set(sources
    main.cpp
    imgui/imconfig.h
    imgui/imgui.cpp
    imgui/imgui.h
    imgui/imgui_demo.cpp
    imgui/imgui_draw.cpp
    imgui/imgui_internal.h
    imgui/imgui_widgets.cpp
    imgui/imstb_rectpack.h
    imgui/imstb_textedit.h
    imgui/imstb_truetype.h
    imgui/imgui_impl_opengl3.cpp
    imgui/imgui_impl_opengl3.h
    imgui/imgui_impl_sdl.cpp
    imgui/imgui_impl_sdl.h
)
These files are from the examples folder of the Dear ImGui repository:
imgui_impl_opengl3.cppimgui_impl_opengl3.himgui_impl_sdl.cppimgui_impl_sdl.h
You can take a look at full CMakeLists.txt here.
Plugging Dear ImGui into SDL
In order for Dear ImGui to “work”, it needs some host window and a rendering loop for its widgets to live in, and SDL provides all that.
Here’s how you can plug Dear ImGui into SDL (based on this example):
// C++
#include <vector>
// SDL
#include <glad/glad.h>
#include <SDL.h>
// Dear ImGui
#include "imgui-style.h"
#include "imgui/imgui_impl_sdl.h"
#include "imgui/imgui_impl_opengl3.h"

#include "functions.h"

int windowWidth = 1280,
    windowHeight = 720;

int main(int argc, char *argv[])
{
    // ...

    // initiate SDL
    if (SDL_Init(SDL_INIT_VIDEO) != 0)
    {
        printf("[ERROR] %s\n", SDL_GetError());
        return -1;
    }

    // set OpenGL attributes
    SDL_GL_SetAttribute(SDL_GL_DOUBLEBUFFER, 1);
    SDL_GL_SetAttribute(SDL_GL_DEPTH_SIZE, 24);
    SDL_GL_SetAttribute(SDL_GL_STENCIL_SIZE, 8);

    SDL_GL_SetAttribute(
        SDL_GL_CONTEXT_PROFILE_MASK,
        SDL_GL_CONTEXT_PROFILE_CORE
        );

    std::string glsl_version = "";
#ifdef __APPLE__
    // GL 3.2 Core + GLSL 150
    glsl_version = "#version 150";
    SDL_GL_SetAttribute( // required on Mac OS
        SDL_GL_CONTEXT_FLAGS,
        SDL_GL_CONTEXT_FORWARD_COMPATIBLE_FLAG
        );
    SDL_GL_SetAttribute(SDL_GL_CONTEXT_MAJOR_VERSION, 4);
    SDL_GL_SetAttribute(SDL_GL_CONTEXT_MINOR_VERSION, 1);
#elif __linux__
    // GL 3.2 Core + GLSL 150
    glsl_version = "#version 150";
    SDL_GL_SetAttribute(SDL_GL_CONTEXT_FLAGS, 0);
    SDL_GL_SetAttribute(SDL_GL_CONTEXT_MAJOR_VERSION, 4);
    SDL_GL_SetAttribute(SDL_GL_CONTEXT_MINOR_VERSION, 3);
#elif _WIN32
    // GL 3.0 + GLSL 130
    glsl_version = "#version 130";
    SDL_GL_SetAttribute(SDL_GL_CONTEXT_FLAGS, 0);
    SDL_GL_SetAttribute(SDL_GL_CONTEXT_MAJOR_VERSION, 3);
    SDL_GL_SetAttribute(SDL_GL_CONTEXT_MINOR_VERSION, 2);
#endif

    SDL_WindowFlags window_flags = (SDL_WindowFlags)(
        SDL_WINDOW_OPENGL
        | SDL_WINDOW_RESIZABLE
        | SDL_WINDOW_ALLOW_HIGHDPI
        );
    SDL_Window *window = SDL_CreateWindow(
        "Dear ImGui SDL",
        SDL_WINDOWPOS_CENTERED,
        SDL_WINDOWPOS_CENTERED,
        windowWidth,
        windowHeight,
        window_flags
        );
    // limit to which minimum size user can resize the window
    SDL_SetWindowMinimumSize(window, 500, 300);

    SDL_GLContext gl_context = SDL_GL_CreateContext(window);
    SDL_GL_MakeCurrent(window, gl_context);

    // enable VSync
    SDL_GL_SetSwapInterval(1);

    if (!gladLoadGLLoader((GLADloadproc)SDL_GL_GetProcAddress))
    {
        std::cerr << "[ERROR] Couldn't initialize glad" << std::endl;
    }
    else
    {
        std::cout << "[INFO] glad initialized\n";
    }

    glViewport(0, 0, windowWidth, windowHeight);

    // setup Dear ImGui context
    IMGUI_CHECKVERSION();
    ImGui::CreateContext();
    ImGuiIO& io = ImGui::GetIO(); (void)io;

    // setup Dear ImGui style
    ImGui::StyleColorsDark();

    // setup platform/renderer bindings
    ImGui_ImplSDL2_InitForOpenGL(window, gl_context);
    ImGui_ImplOpenGL3_Init(glsl_version.c_str());

    // colors are set in RGBA, but as float
    ImVec4 background = ImVec4(35/255.0f, 35/255.0f, 35/255.0f, 1.00f);

    glClearColor(background.x, background.y, background.z, background.w);
    bool loop = true;
    while (loop)
    {
        glClear(GL_COLOR_BUFFER_BIT | GL_DEPTH_BUFFER_BIT | GL_STENCIL_BUFFER_BIT);

        SDL_Event event;
        while (SDL_PollEvent(&event))
        {
            // without it you won't have keyboard input and other things
            ImGui_ImplSDL2_ProcessEvent(&event);
            // you might also want to check io.WantCaptureMouse and io.WantCaptureKeyboard
            // before processing events

            switch (event.type)
            {
            case SDL_QUIT:
                loop = false;
                break;

            case SDL_WINDOWEVENT:
                switch (event.window.event)
                {
                case SDL_WINDOWEVENT_RESIZED:
                    windowWidth = event.window.data1;
                    windowHeight = event.window.data2;
                    // std::cout << "[INFO] Window size: "
                    //           << windowWidth
                    //           << "x"
                    //           << windowHeight
                    //           << std::endl;
                    glViewport(0, 0, windowWidth, windowHeight);
                    break;
                }
                break;

            case SDL_KEYDOWN:
                switch (event.key.keysym.sym)
                {
                case SDLK_ESCAPE:
                    loop = false;
                    break;
                }
                break;
            }
        }

        // start the Dear ImGui frame
        ImGui_ImplOpenGL3_NewFrame();
        ImGui_ImplSDL2_NewFrame(window);
        ImGui::NewFrame();

        // a window is defined by Begin/End pair
        {
            static int counter = 0;
            // get the window size as a base for calculating widgets geometry
            int sdl_width = 0, sdl_height = 0, controls_width = 0;
            SDL_GetWindowSize(window, &sdl_width, &sdl_height);
            controls_width = sdl_width;
            // make controls widget width to be 1/3 of the main window width
            if ((controls_width /= 3) < 300) { controls_width = 300; }

            // position the controls widget in the top-right corner with some margin
            ImGui::SetNextWindowPos(ImVec2(10, 10), ImGuiCond_Always);
            // here we set the calculated width and also make the height to be
            // be the height of the main window also with some margin
            ImGui::SetNextWindowSize(
                ImVec2(static_cast<float>(controls_width), static_cast<float>(sdl_height - 20)),
                ImGuiCond_Always
                );
            // create a window and append into it
            ImGui::Begin("Controls", NULL, ImGuiWindowFlags_NoResize);

            ImGui::Dummy(ImVec2(0.0f, 1.0f));
            ImGui::TextColored(ImVec4(1.0f, 0.0f, 1.0f, 1.0f), "Platform");
            ImGui::Text("%s", SDL_GetPlatform());
            ImGui::Text("CPU cores: %d", SDL_GetCPUCount());
            ImGui::Text("RAM: %.2f GB", SDL_GetSystemRAM() / 1024.0f);

            // buttons and most other widgets return true when clicked/edited/activated
            if (ImGui::Button("Counter button"))
            {
                std::cout << "counter button clicked\n";
                counter++;
            }
            ImGui::SameLine();
            ImGui::Text("counter = %d", counter);

            ImGui::End();
        }

        // rendering
        ImGui::Render();
        ImGui_ImplOpenGL3_RenderDrawData(ImGui::GetDrawData());

        SDL_GL_SwapWindow(window);
    }

    ImGui_ImplOpenGL3_Shutdown();
    ImGui_ImplSDL2_Shutdown();
    ImGui::DestroyContext();

    SDL_GL_DeleteContext(gl_context);
    SDL_DestroyWindow(window);
    SDL_Quit();

    // ...
}
You will also need to tell Dear ImGui that you’re using exactly glad. Add the following line to the top of imgui/imgui_impl_opengl3.cpp:
#define IMGUI_IMPL_OPENGL_LOADER_GLADSo it would be before these lines:
#if defined(IMGUI_IMPL_OPENGL_LOADER_GL3W)
#include <GL/gl3w.h>    // Needs to be initialized with gl3wInit() in user's code
#elif defined(IMGUI_IMPL_OPENGL_LOADER_GLEW)
#include <GL/glew.h>    // Needs to be initialized with glewInit() in user's code
#elif defined(IMGUI_IMPL_OPENGL_LOADER_GLAD)
#include <glad/glad.h>  // Needs to be initialized with gladLoadGL() in user's code
#else
#include IMGUI_IMPL_OPENGL_LOADER_CUSTOM
#endif
How to customize the style
Dear ImGui style is highly customizable. There are several pre-defined styles made by community, and here’s how you can create your own - replace ImGui::StyleColorsDark(); with the following:
ImGuiStyle &style = ImGui::GetStyle();

style.WindowPadding                  = ImVec2(8, 6);
style.WindowRounding                 = 0.0f;
style.FramePadding                   = ImVec2(5, 7);
style.ItemSpacing                    = ImVec2(5, 5);
style.Colors[ImGuiCol_Text]          = ImVec4(1.00f, 1.00f, 1.00f, 1.00f);
style.Colors[ImGuiCol_TextDisabled]  = ImVec4(0.50f, 0.50f, 0.50f, 1.00f);
style.Colors[ImGuiCol_WindowBg]      = ImVec4(0.06f, 0.06f, 0.06f, 0.94f);
style.Colors[ImGuiCol_Button]        = ImVec4(0.44f, 0.44f, 0.44f, 0.40f);
style.Colors[ImGuiCol_ButtonHovered] = ImVec4(0.46f, 0.47f, 0.48f, 1.00f);
style.Colors[ImGuiCol_ButtonActive]  = ImVec4(0.42f, 0.42f, 0.42f, 1.00f);
// ...
How to display a list
There is a ListBox widget for displaying lists. But making it to accept your lists takes some effort.
One thing is when you have an inline defined list like in standard demo:
const char* listbox_items[] = { "Apple", "Banana", "Cherry", "Kiwi", "Mango", "Orange", "Pineapple" };
static int listbox_item_current = 1;
ImGui::ListBox(
    "Fruits",
    &listbox_item_current,
    listbox_items,
    IM_ARRAYSIZE(listbox_items),
    5
    );
And another thing is when you have a list of some real things, like names of files in a folder. For that you’ll need to define a special getter function, for example:
static auto vector_getter = [](void *vec, int idx, const char **out_text)
{
    auto &vector = *static_cast<std::vector<std::string> *>(vec);
    if (idx < 0 || idx >= static_cast<int>(vector.size()))
    {
        return false;
    }
    *out_text = vector.at(idx).c_str();
    return true;
};
And then you can use it in ListBox constructor:
// list of files
std::vector<std::string> files;
// there will be an example of reading files in folder a bit later
static int currentFile = 0;
ImGui::ListBox(
"",
¤tFile,
vector_getter,
&files,
static_cast<int>(files.size())
);How to use a custom font
You can use a font from file:
// setup Dear ImGui context
IMGUI_CHECKVERSION();
ImGui::CreateContext();
ImGuiIO& io = ImGui::GetIO(); (void)io;
io.Fonts->AddFontFromFileTTF("verdana.ttf", 18.0f, NULL, NULL);
Now all the text in your application will have Verdana font. If you want different labels to have different fonts, then it’s a bit more complicated, and I suggest you to try it yourself.
Application will expect to find verdana.ttf in its folder, so here’s how to copy it to build directory using CMake:
add_custom_command(
    TARGET ${CMAKE_PROJECT_NAME} POST_BUILD
    COMMAND ${CMAKE_COMMAND} -E copy
            ${CMAKE_SOURCE_DIR}/verdana.ttf
            ${CMAKE_CURRENT_BINARY_DIR}/verdana.ttf
            )
Building from Visual Studio Code
So I have these two extensions installed for CMake:
Why two? Because one provides syntax highlighting and another provides API for calling CMake from Command Palette. Why there is no extension with both functionalities? Good fucking question.
If you want your build directory to be in the same folder as your project, then set this property in your settings.json:
{
    "...",
    "cmake.buildDirectory": "${workspaceRoot}/build/${buildType}",
    "..."
}
And I would recommend to do so, because by default your build directory can go to some retarded place on Windows - in my case it was C:\Users\vasya\CMakeBuilds\.
I also have C++ extension installed, which provides certain things for C++ (although for auto-completion I’m using Clang Command Adapter). For it to be aware of all your custom headers it needs to know where to find those. So, for example, if you get something like this:

Then you need to add paths to those headers to your c_cpp_properties.json:
{
    "configurations": [
        {
            "name": "Win32",
            "includePath": [
                "${workspaceFolder}/**",
                "e:/tools/vs/vs2019/VC/Tools/MSVC/14.21.27702/include",
                "e:/Windows Kits/10/Include/10.0.17763.0/ucrt",
                "e:/tools/sdl/include"
            ],
            "..."
If you won’t do that, the project will still compile as this option is not for the actual building - it’s just for IntelliSense, which is the source of those annoying warnings.
Now, to build a project you need a kit. Run these two commands (Ctrl/Cmd + Shift + P):
CMake: Scan for Kits
CMake: Select a Kit
And select whatever is your main C++ kit.
In some cases you might also want to change the CMake generator which produces files for the build system. By default that would most likely be Ninja and in most cases it will work just fine, but if you’ll need to swich to one of the generators provided by Visual Studio, then change the cmake.generator value to one of those:
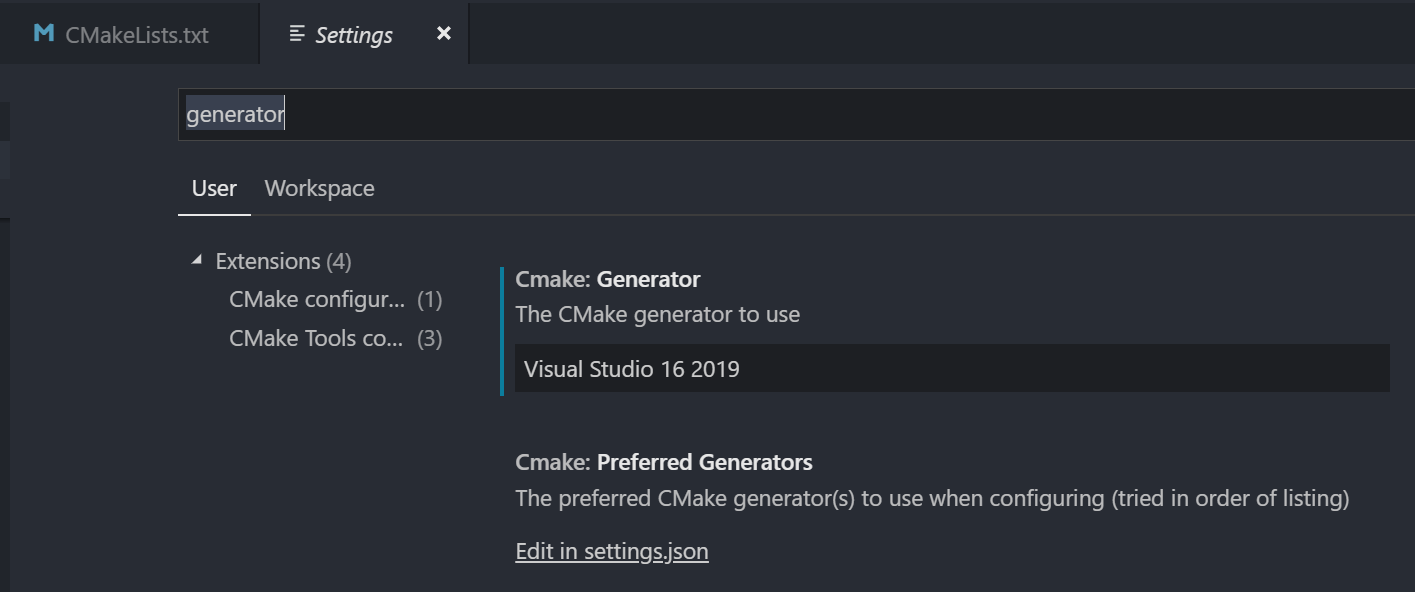
Now configure the project:
CMake: ConfigureAnd build it:
CMake: BuildBy default it will build a Debug configuration. If you want to switch to Release, run this command:
CMake: Set the current build variantAnd build the project.
Full source code of the application I used in the article is available here (note the commit hash, as in later revisions the dependencies are resolved with a package manager).
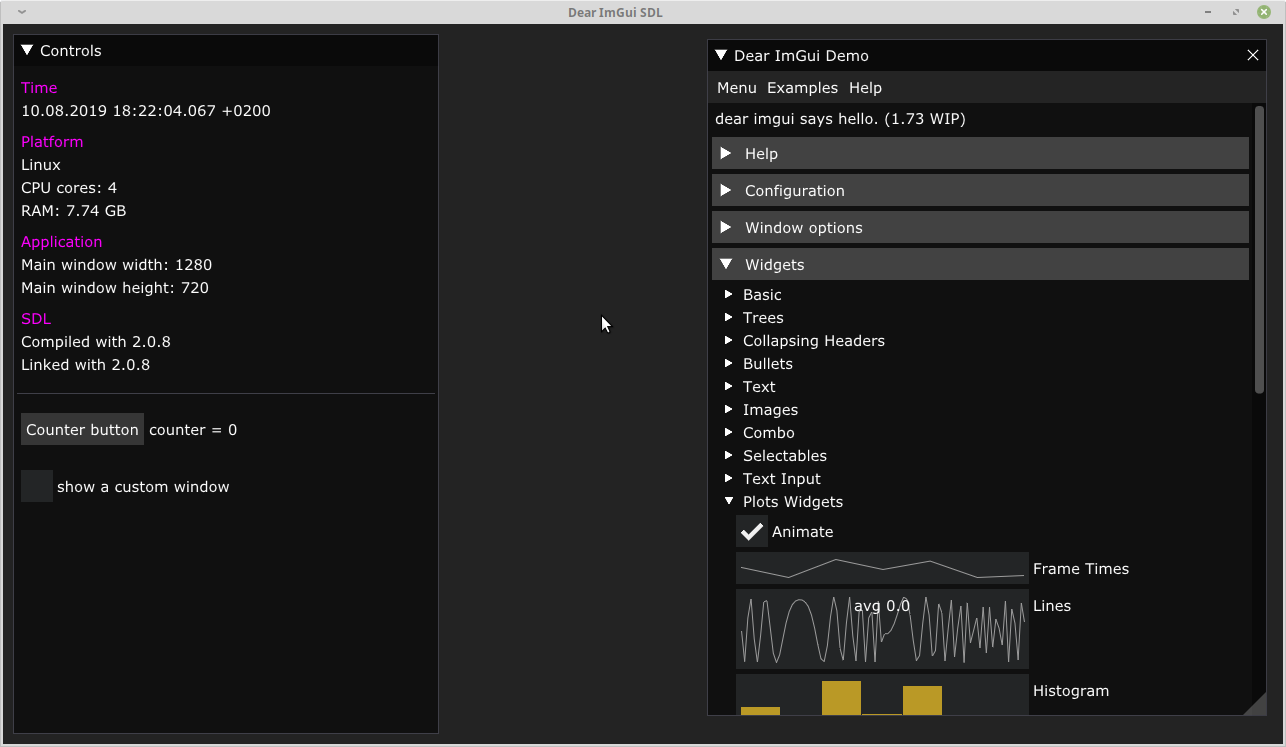
It’s cross-platform
And it works on Windows:
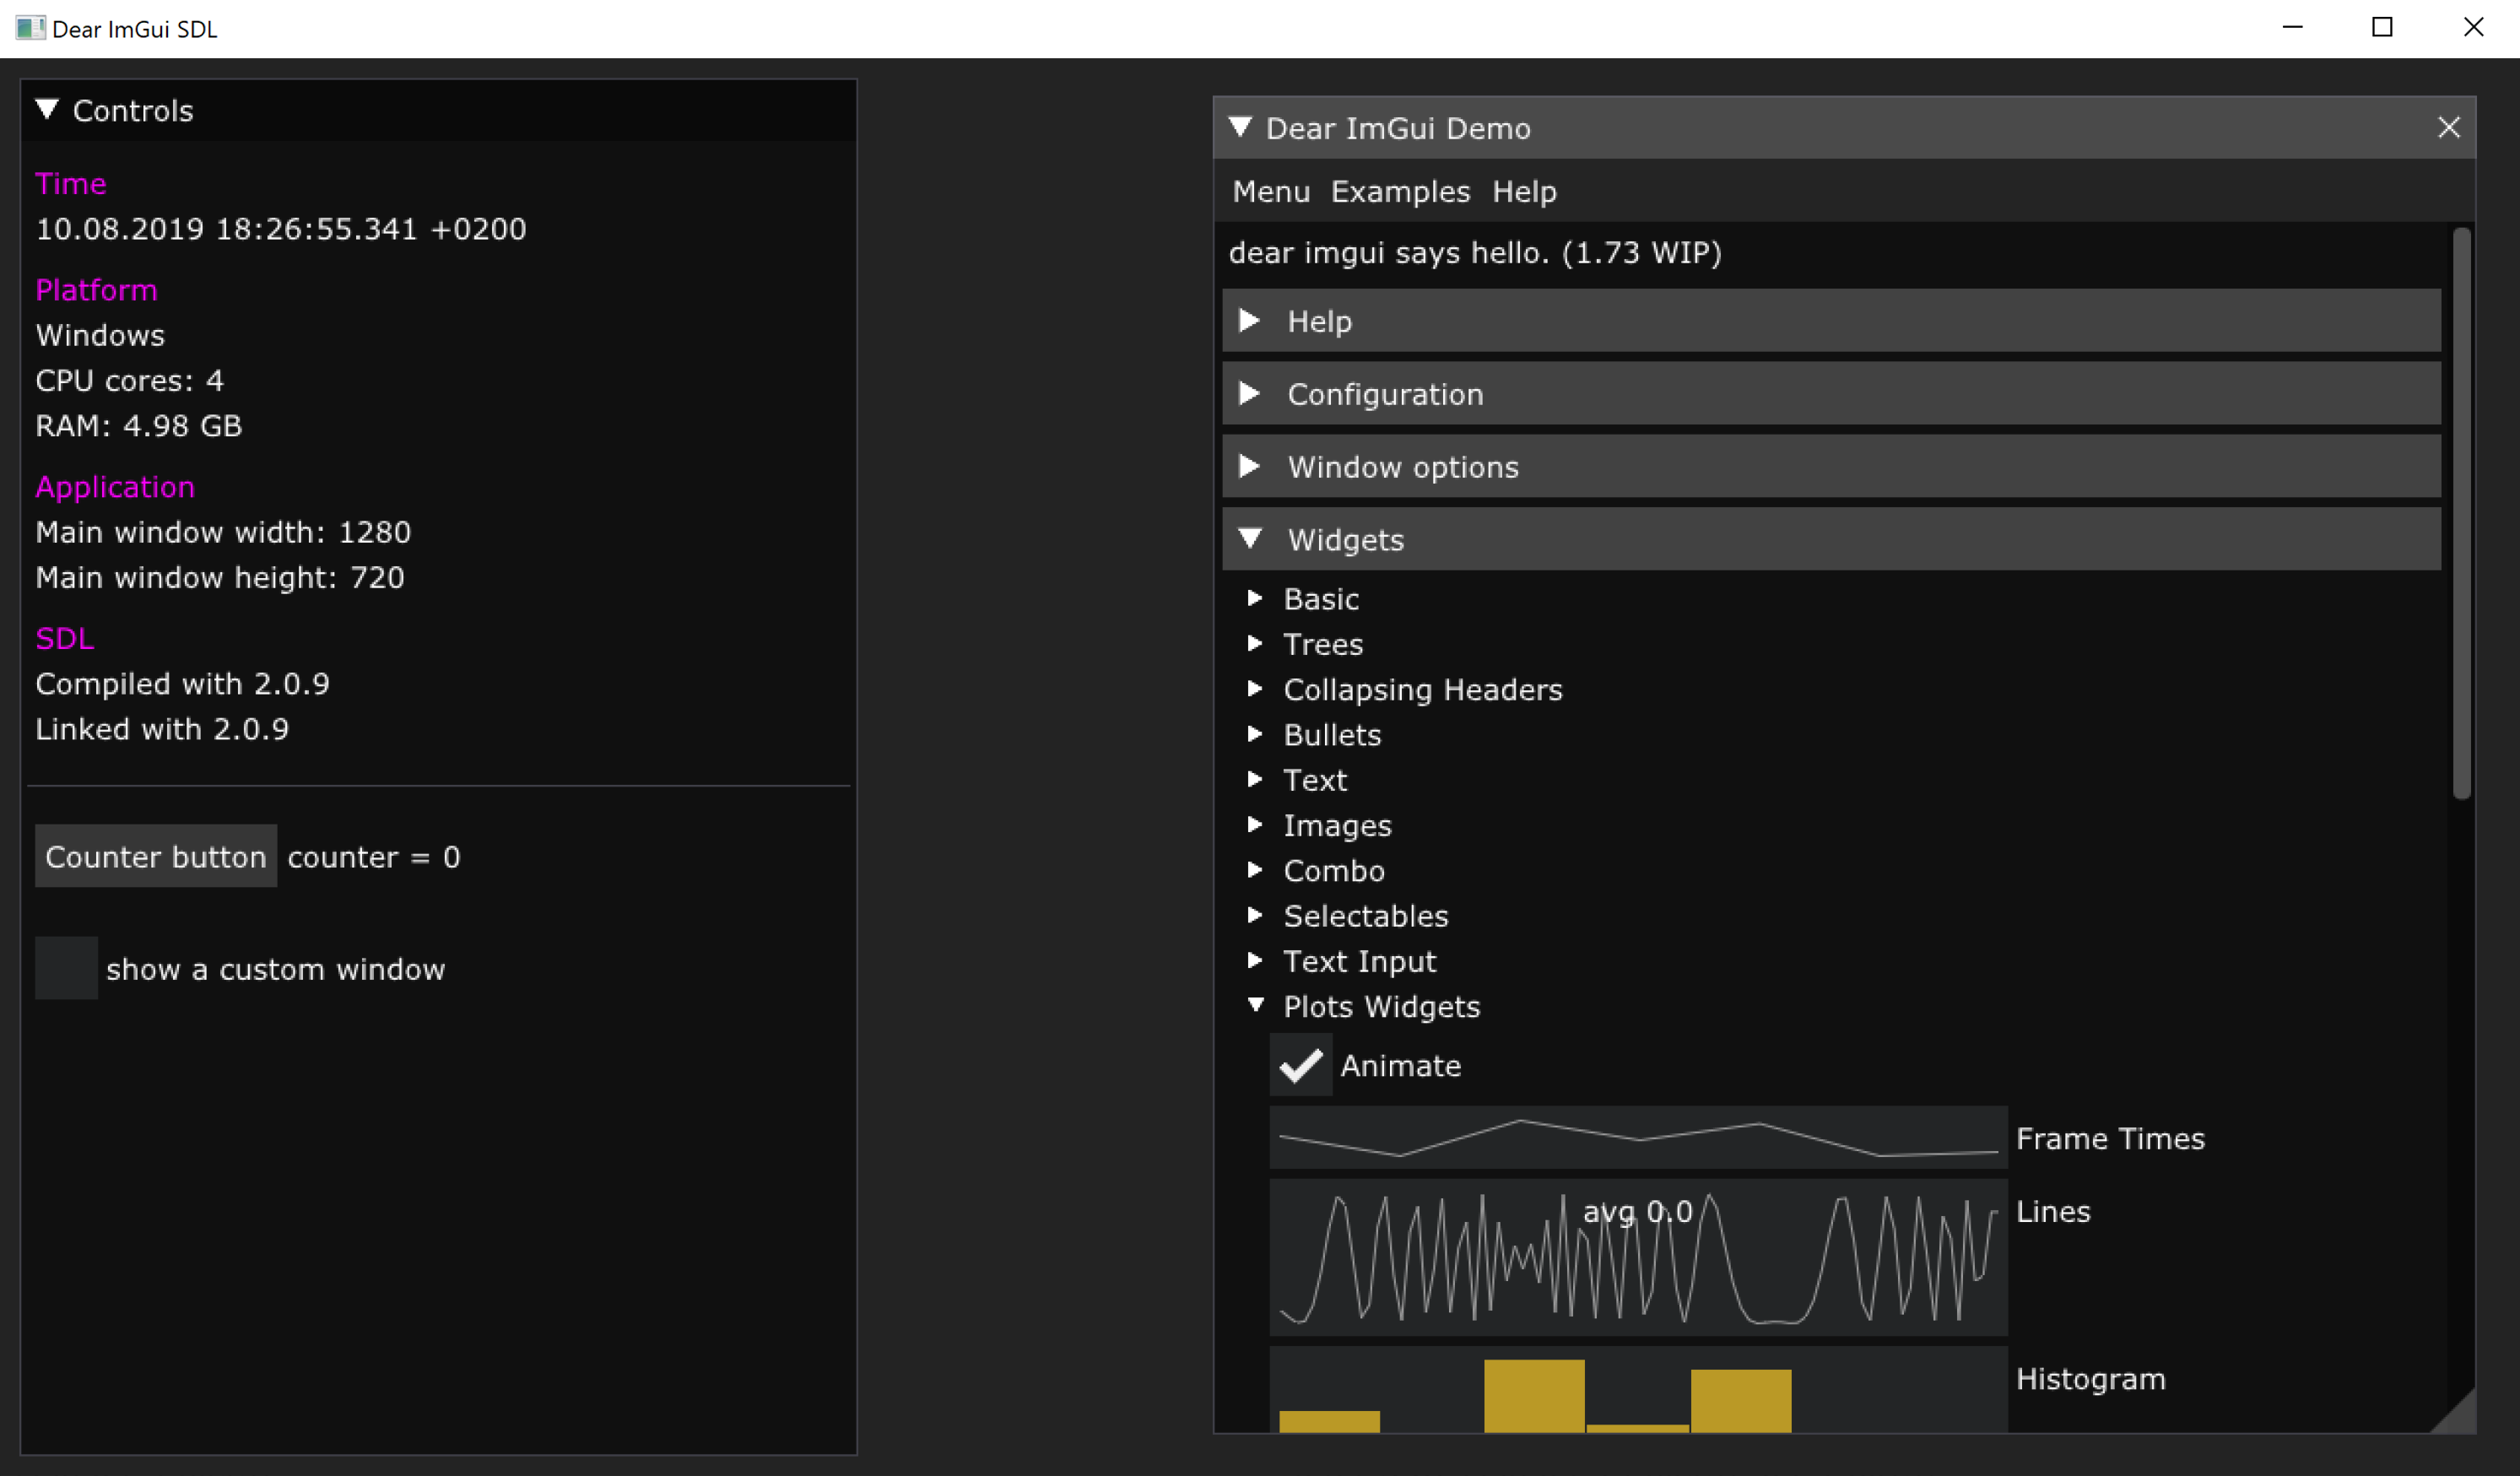
and on Linux too:
Dealing with C++ without Qt
That’s just a bonus part.
To find yourself one-to-one with bare C++ after developing with Qt for years is one hell of an experience. All the simple and trivial things suddenly become complicated.
Concatenate a string
In Qt you can form a string like this:
#include <QString>

// ...

QString someString = QString("ololo, %1 with %2 words (actually, it's more)")
        .arg("this is a string")
        .arg(4);
There are several ways to do that in C++ without Qt, and I liked the one with ostringstream the most:
#include <sstream>

// ...

std::ostringstream someStream;
someStream << "ololo, " << "this is a string" << " with " << 4 << " words (actually, it's more)";
std::string someString = someStream.str();
Get a string with current date and time
Here’s how it is done in Qt:
#include <QDateTime>
#include <QString>

// ...

QString currentTime = QDateTime::currentDateTime()
    .toString("dd.MM.yyyy hh:mm:ss.zzz t");
But when it comes to “naked” C++, fucking hell, just look at this:
#include <iostream>
#include <sstream>
#include <chrono>
#include <ctime>
#include <iomanip>

// ...

// "auto" here hides monstrous "std::chrono::time_point<std::chrono::system_clock>"
auto now = std::chrono::system_clock::now();
// you need to get milliseconds explicitly
auto milliseconds = std::chrono::duration_cast<std::chrono::milliseconds>(
    now.time_since_epoch()
    ) % 1000;
// and that's a "normal" point of time with seconds
auto timeNow = std::chrono::system_clock::to_time_t(now);

std::ostringstream currentTimeStream;
currentTimeStream << std::put_time(localtime(&timeNow), "%d.%m.%Y %H:%M:%S")
                  << "." << std::setfill('0') << std::setw(3) << milliseconds.count()
                  << " " << std::put_time(localtime(&timeNow), "%z");

std::string currentTime = currentTimeStream.str();
All these lines just to get the following:
01.06.2019 15:21:52.387 +0200List all the files in application directory
Qt variant is simple:
#include <QCoreApplication>
#include <QDir>
#include <QStringList>

// ...

QDir directory(qApp->applicationDirPath());
QStringList files = directory.entryList();
And what about pure C++? Well, first of all, in C++ it works only from C++17 standard onwards, so (given you have a complaint compiler) you’ll need to set it somewhere in the beginning of CMakeLists.txt:
set(CMAKE_CXX_STANDARD 17)After that you’ll be able to use filesystem functionality in your code:
#include <filesystem>
#include <vector>

// ...

std::vector<std::string> files;
auto currentPath = std::filesystem::current_path();
for (const auto &entry : std::filesystem::directory_iterator(currentPath))
{
    files.push_back(entry.path().filename().string().data());
}
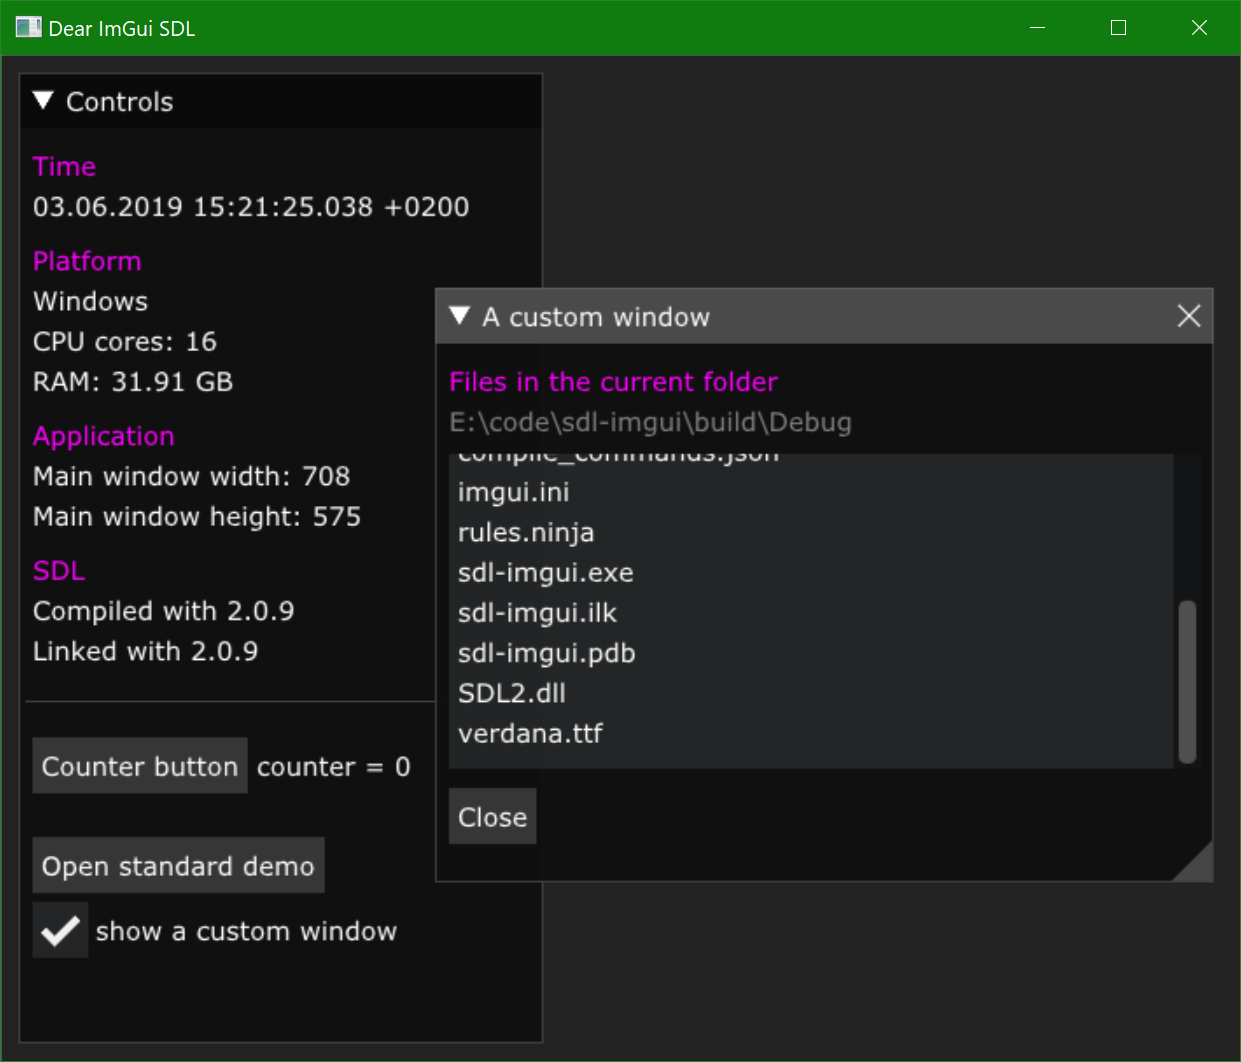
Works fine on Windows 10 with MSVC:
$ systeminfo | findstr /B /C:"OS Name" /C:"OS Version"
OS Name:                   Microsoft Windows 10 Enterprise
OS Version:                10.0.17763 N/A Build 17763

$ cl.exe
Microsoft (R) C/C++ Optimizing Compiler Version 19.21.27702.2 for x64
Here’s a result - list of files in the application directory:
No C++17 filesystem on Mac OS
…But in case of Mac OS it won’t compile:
fatal error: 'filesystem' file not found
#include <filesystem>
         ^~~~~~~~~~~~
Because apparently C++17 is not that well supported on the latest Mac OS:
$ sw_vers -productVersion
10.14.5

$ xcodebuild -version
Xcode 10.2.1
Build version 10E1001

$ clang --version
Apple LLVM version 10.0.1 (clang-1001.0.46.4)
Target: x86_64-apple-darwin18.6.0
Thread model: posix
InstalledDir: /Applications/Xcode.app/Contents/Developer/Toolchains/XcodeDefault.xctoolchain/usr/bin

$ gcc --version
Configured with: --prefix=/Applications/Xcode.app/Contents/Developer/usr --with-gxx-include-dir=/Applications/Xcode.app/Contents/Developer/Platforms/MacOSX.platform/Developer/SDKs/MacOSX10.14.sdk/usr/include/c++/4.2.1
Apple LLVM version 10.0.1 (clang-1001.0.46.4)
Target: x86_64-apple-darwin18.6.0
Thread model: posix
InstalledDir: /Applications/Xcode.app/Contents/Developer/Toolchains/XcodeDefault.xctoolchain/usr/bin
No C++17 filesystem on Linux
…And there is no <filesystem> on Linux either! Of course, I can tell only for the Linux I have, but still:
$ cat /proc/version
Linux version 4.15.0-50-generic (buildd@lcy01-amd64-013) (gcc version 7.3.0 (Ubuntu 7.3.0-16ubuntu3)) #54-Ubuntu SMP Mon May 6 18:46:08 UTC 2019

$ lsb_release -a
Distributor ID:    LinuxMint
Description:    Linux Mint 19.1 Tessa
Release:    19.1
Codename:    tessa

$ gcc --version
gcc (Ubuntu 7.4.0-1ubuntu1~18.04) 7.4.0
There are guides how to make it work, and like with Mac OS you’ll need to add some specific headers paths, and in some cases include <experimental/filesystem> instead of <filesystem> and then replace all std::filesystem with std::experimental::filesystem, or perhaps even switch to some other C++ toolchain entirely, and so on, and so on… fuck these crutches, that’s just too much in terms of cross-platform-ability.
So, it looks like Windows is the only platform where filesystem from C++17 “just works” out of the box at the moment. I fucking lol’d.
Updates
2025-03-25 | Resolving dependencies with a package manager
As I learned a bit more about dependencies management in C++ projects, I have updated the example application for this article to use vcpkg for resolving project dependencies (glad and SDL). The Dear ImGui sources are still vendored though.


