Gollum - Git-based Markdown wiki
We needed to create an internal knowledge base, preferably based on a wiki-engine. The requirements were:
- in-house hosting
- simple maintenance
- no vendor-lock - ideally, storing articles as plain-text files
- customization and styling
- not overloaded with gigabytes of fancy JS-frameworks
- version control
- Markdown markup
From my own researching and evaluating, there are very few wikis that meet all the requirements, and out of those Gollum seems to be the best.

Even though it has its own installation guide, for me that wasn’t enough, so here are my guides for Linux and Mac OS, plus some customizing and tweaking.
At first, before discovering Gollum, I actually decided to create my own wiki-engine, as I didn’t like any of the wikis I found by that moment, and even started prototyping it with .NET Core Blazor (server-side variant). But then I took a closer look at Gollum and abandoned the idea.
Gollum has it all:
- no mandatory “cloud”, host it anywhere you want, even locally
- very simple maintenance, especially comparing to Confluence, Redmine, MediaWiki and similar ones that require a database
- articles source is plain-text files, so you own your knowledge base and free to migrate to something else
- good customization, including custom CSS and JS
- version control is in its nature, as content lives in a Git repository
- Markdown (and additional markups)
By the way, Gollum is what is running wikis on GitHub and GitLab, so you can actually clone wikis from there and run them locally on your machine.
Installation
GNU/Linux
The goal is to run Gollum behind NGINX as a reverse proxy, available at http://wiki.your.host.
Packages
Install required packages:
$ sudo apt install ruby ruby-dev make zlib1g-dev libicu-dev build-essential git cmake
$ sudo apt install zlib1g zlib1g-dev libicu-dev
$ sudo apt install pkg-config
$ sudo apt install libssl-dev
and then Gollum gem itself:
$ sudo gem install gollumUser and repository
Create a user to run the wiki from:
$ sudo adduser --shell /bin/bash --gecos 'Gollum application' gollumLogin as this user and create the wiki folder, initialize the Git repository and set the default commits author:
$ sudo --login --user gollum
$ mkdir wiki
$ cd wiki
$ git init --bare .
$ git config user.name "birdperson"
$ git config user.email "birdperson@your.host"
$ exit
Note the --bare option - it is required for users to be able to use this repository as a remote for their local cloned repository, so they could push their commits to it.
Templates
Gollum uses Mustache system for templating. If you’d like to customize default wiki layouts by modifying Gollum’s base templates, don’t edit the default ones - make a copy and work with the copies instead:
$ mkdir -p /usr/local/share/gollum/templates
$ cp -r /var/lib/gems/2.7.0/gems/gollum-VERSION/lib/gollum/templates/* /usr/local/share/gollum/templates/
$ sudo chown -R gollum:gollum /usr/local/share/gollum
You’ll also need to set this path in the config or specify it on launch:
$ gollum --config config.rb --host localhost \
    --template-dir /path/to/your/custom/templates
Config
Create the wiki config:
$ sudo mkdir -p /etc/gollum
$ sudo nano /etc/gollum/config.rb
# define the wiki options
wiki_options = {
:h1_title => false,
:user_icons => 'gravatar',
:live_preview => false,
:allow_uploads => true,
:per_page_uploads => true,
:allow_editing => true,
:css => true,
:js => true,
:mathjax => true,
:emoji => true,
:show_all => true,
:template_dir => '/usr/local/share/gollum/templates' # if you have custom templates
}
# pass wiki options to the Gollum app
Precious::App.set(:wiki_options, wiki_options)
# if present, undefine the :FORMAT_NAMES constant to avoid the
# "already initialized constant FORMAT_NAMES" warning
Gollum::Page.send :remove_const, :FORMAT_NAMES if defined? Gollum::Page::FORMAT_NAMES
# redefine the :FORMAT_NAMES constant to limit the available
# formats on the editor to only markdown
Gollum::Page::FORMAT_NAMES = { :markdown => "Markdown" }systemd
Create a systemd service:
$ sudo nano /etc/systemd/system/gollum.service[Unit]
Description=Gollum wiki
After=network.target
[Service]
Type=simple
User=gollum
Group=gollum
WorkingDirectory=/home/gollum/wiki
ExecStart=/usr/local/bin/gollum --config "/etc/gollum/config.rb" --host localhost
Restart=on-abort
[Install]
WantedBy=multi-user.targetWhy localhost? You guessed it right - because we’ll be running it behind a proper reverse proxy, such as NGINX, so we don’t want Gollum to expose its port to the network.
$ sudo systemctl enable gollum.service
$ sudo systemctl start gollum.service
Verify that it’s bound to 127.0.0.1:
$ sudo ss -lntup

...
tcp    LISTEN  0       4096          127.0.0.1:4567          0.0.0.0:*      users:(("gollum",pid=33932,fd=5))
...
You can also try to open http://your.host:4567 - it should fail.
NGINX
Install and setup NGINX as a reverse proxy:
$ sudo apt install nginx
$ sudo rm /etc/nginx/sites-enabled/default
$ sudo nano /etc/nginx/sites-available/wiki.your.host
server {
listen 80 default_server;
listen [::]:80 default_server;
server_name _;
location / {
proxy_set_header Host $host;
proxy_set_header X-Forwarded-For $proxy_add_x_forwarded_for;
proxy_set_header X-Forwarded-Proto $scheme;
proxy_set_header X-Scheme $scheme;
proxy_redirect off;
proxy_pass http://localhost:4567;
}
}$ sudo ln -s /etc/nginx/sites-available/wiki.your.host /etc/nginx/sites-enabled/
$ sudo systemctl restart nginx.serviceNow your wiki should be available at http://wiki.your.host. Obviously, first you’d need to add a record for wiki.your.host in your local DNS server or at your hoster control panel (assuming you already have your.host domain registered).
In our case we host wiki in the internal network only, so it’s not exposed to the internet, and there is no real need to restrict access to it. However, it might still be a good idea to protect it with at least Basic authentication, unless you plan do add a proper authentication later.
Mac OS
Here the goal is to simply run Gollum locally on demand - to preview your local changes before pushing them to the main repository on server.
Install required packages:
$ brew install icu4c
$ brew install pkg-config
$ brew install ruby
Since Mac OS already has system Ruby, you’ll need to “overwrite” it in your ~/.bash_profile:
export PATH="/usr/local/opt/ruby/bin:$PATH"
export LDFLAGS="-L/usr/local/opt/ruby/lib"
export CPPFLAGS="-I/usr/local/opt/ruby/include"
export PKG_CONFIG_PATH="/usr/local/opt/ruby/lib/pkgconfig"
Update the environment:
$ source ~/.bash_profileand check the versions:
$ ruby --version
ruby 3.0.0p0 (2020-12-25 revision 95aff21468) [x86_64-darwin19]

$ gem --version
3.2.3
Try to install Gollum now. In my case it failed:
$ gem install gollum

Building native extensions. This could take a while...
ERROR:  Error installing gollum:
    ERROR: Failed to build gem native extension.

    current directory: /usr/local/lib/ruby/gems/3.0.0/gems/ffi-1.14.2/ext/ffi_c
/usr/local/opt/ruby/bin/ruby -I /usr/local/Cellar/ruby/3.0.0_1/lib/ruby/3.0.0 -r ./siteconf20210104-30597-m0yzw0.rb extconf.rb
checking for ffi_prep_closure_loc() in -lffi... yes
checking for ffi_prep_cif_var()... yes
checking for ffi_raw_call()... yes
checking for ffi_prep_raw_closure()... yes
creating extconf.h
creating Makefile

current directory: /usr/local/lib/ruby/gems/3.0.0/gems/ffi-1.14.2/ext/ffi_c
make "DESTDIR=" clean

current directory: /usr/local/lib/ruby/gems/3.0.0/gems/ffi-1.14.2/ext/ffi_c
make "DESTDIR="
compiling AbstractMemory.c
compiling ArrayType.c
compiling Buffer.c
compiling Call.c
compiling ClosurePool.c
compiling DynamicLibrary.c
compiling Function.c
Function.c:847:17: error: implicit declaration of function 'ffi_prep_closure_loc' is invalid in C99 [-Werror,-Wimplicit-function-declaration]
    ffiStatus = ffi_prep_closure_loc(closure->pcl, &fnInfo->ffi_cif, callback_invoke, closure, code);
                ^
Function.c:847:17: note: did you mean 'ffi_prep_closure'?
/Library/Developer/CommandLineTools/SDKs/MacOSX10.14.sdk/usr/include/ffi/ffi.h:269:1: note: 'ffi_prep_closure' declared here
ffi_prep_closure(
^
1 error generated.
make: *** [Function.o] Error 1

make failed, exit code 2
Here this error is caused by the obsolete libffi library. To fix it, force the required gem, and this time Gollum should install fine:
$ gem install ffi -- --disable-system-libffi
$ gem install gollum
Make a symlink for Gollum executable somewhere in your PATH, for example:
$ ln -s /usr/local/lib/ruby/gems/3.0.0/gems/gollum-VERSION/bin/gollum /usr/local/bin/Now do the steps described in local editing and try to run your wiki. It might fail with the following error:
$ cd /path/to/the/clonned/wiki/repository
$ gollum --config config.rb --host localhost
/usr/local/lib/ruby/gems/3.0.0/gems/sinatra-2.1.0/lib/sinatra/base.rb:1755:in `detect_rack_handler': Server handler (thin,puma,reel,HTTP,webrick) not found. (RuntimeError)
    from /usr/local/lib/ruby/gems/3.0.0/gems/sinatra-2.1.0/lib/sinatra/base.rb:1493:in `run!'
    from /Users/YOURNAME/bin/gollum:286:in `<main>'
That means that you have no web-server in your Ruby. Install some, for example webrick, and then you’ll be able to run the wiki:
$ gem install webrick

$ gollum --config config.rb --host localhost
[2021-01-04 16:40:58] INFO  WEBrick 1.7.0
[2021-01-04 16:40:58] INFO  ruby 3.0.0 (2020-12-25) [x86_64-darwin19]
== Sinatra (v2.1.0) has taken the stage on 4567 for production with backup from WEBrick
[2021-01-04 16:40:58] INFO  WEBrick::HTTPServer#start: pid=38628 port=4567
The wiki is now available on http://localhost:4567.
Editing and authentication
Web UI
Gollum has a web UI for editing, and that would be the easiest option in most cases.
Sadly, there is no authentication out of the box, but it is possible to add it, for example like this or via LDAP. At the very least you can set-up Basic authentication.
Another thing to note due to the lack of authentication is that by default all the changes made via web UI will be authored by the default user from Git repository config on server, which is rather unfortunate in case of a team wiki.
Local editing
But why edit wiki in web UI, when its content is just plain-text Markdown files in a Git repository? You can work with it as with any other Git repository!
So, every team member can have a local copy of the wiki, author and sign their commits and push them to the main repository via SSH (so everyone authenticates with their personal SSH keys). You can even disable editing via web UI, so Git and SSH would be the only way to edit the wiki. How awesome is that.
Establish SSH connection to the wiki host
As usual, create an SSH key on your machine and add the wiki host to your SSH config (~/.ssh/config):
Host wiki.your.host
HostName wiki.your.host # or its IP address, if you don't have a domain
User gollum
IdentityFile ~/.ssh/NAME-OF-THE-PRIVATE-KEY-FILE-YOU-JUST-CREATED
Then go the wiki host and add your public key to /home/gollum/.ssh/authorized_keys.
Clone the wiki repository
Now you should be able to clone the wiki repository via SSH. On your local machine clone the wiki repository like this:
$ cd /path/to/your/documents/or/whatever
$ git clone gollum@wiki.your.host:wiki wiki.your.host
Make sure that you have meaningful username and e-mail in your Git config (these values will be used for authoring your changes in the wiki):
$ cd ./wiki.your.host
$ git config user.name
$ git config user.email
The rest is as with any other Git repository: you do some changes, commit them and push to remote.
Run Gollum
To run Gollum locally, first install it on your machine, create a config in the root of the wiki repository that you’ve just cloned (no need to commit the local config, and actually add it to .gitignore) and then:
$ cd /path/to/wiki.your.host
$ gollum --config config.rb --host localhost
Now you can open http://localhost:4567 in your browser. Note that it will only render what’s already committed, so if you don’t see changes you’ve made, check if you’ve committed them.
The main purpose of running Gollum locally is to preview your changes and amend local commits before pushing to remote. For example, you’ve committed some changes (did not push them yet), previewed them in browser and decided to do some more changes. To preview new changes you’ll need to commit them too, but instead of making a new commit you can just do this:
$ git add . && git commit --amend --no-editThat will update your last commit (--amend), preserving the original commit message (--no-edit). You can amend your commit countless number of times and push it to the main repository only when you are completely satisfied with the changes.
Customization
As already mentioned, you can customize default wiki layouts by editing Gollum templates.
CSS and JS
Aside from templates, you can also add your customs CSS and JS. To enable those, make sure your wiki config has the following lines:
...
:css => true,
:js => true,
...
Then create custom.css and custom.js files in the wiki root. Now you can either write your custom CSS and JS right there, or use them as “importing points” - for example here’s my custom.css:
@import url("site.css");
@import url("site-tablet.css");
@import url("site-phone.css");
@import url("homepage.css");
and then I do the actual styling in those files.
By the way, even though the pages markup is Markdown, you can just as well use raw HTML blocks. And you can also assign CSS classes to Markdown elements, such as images:
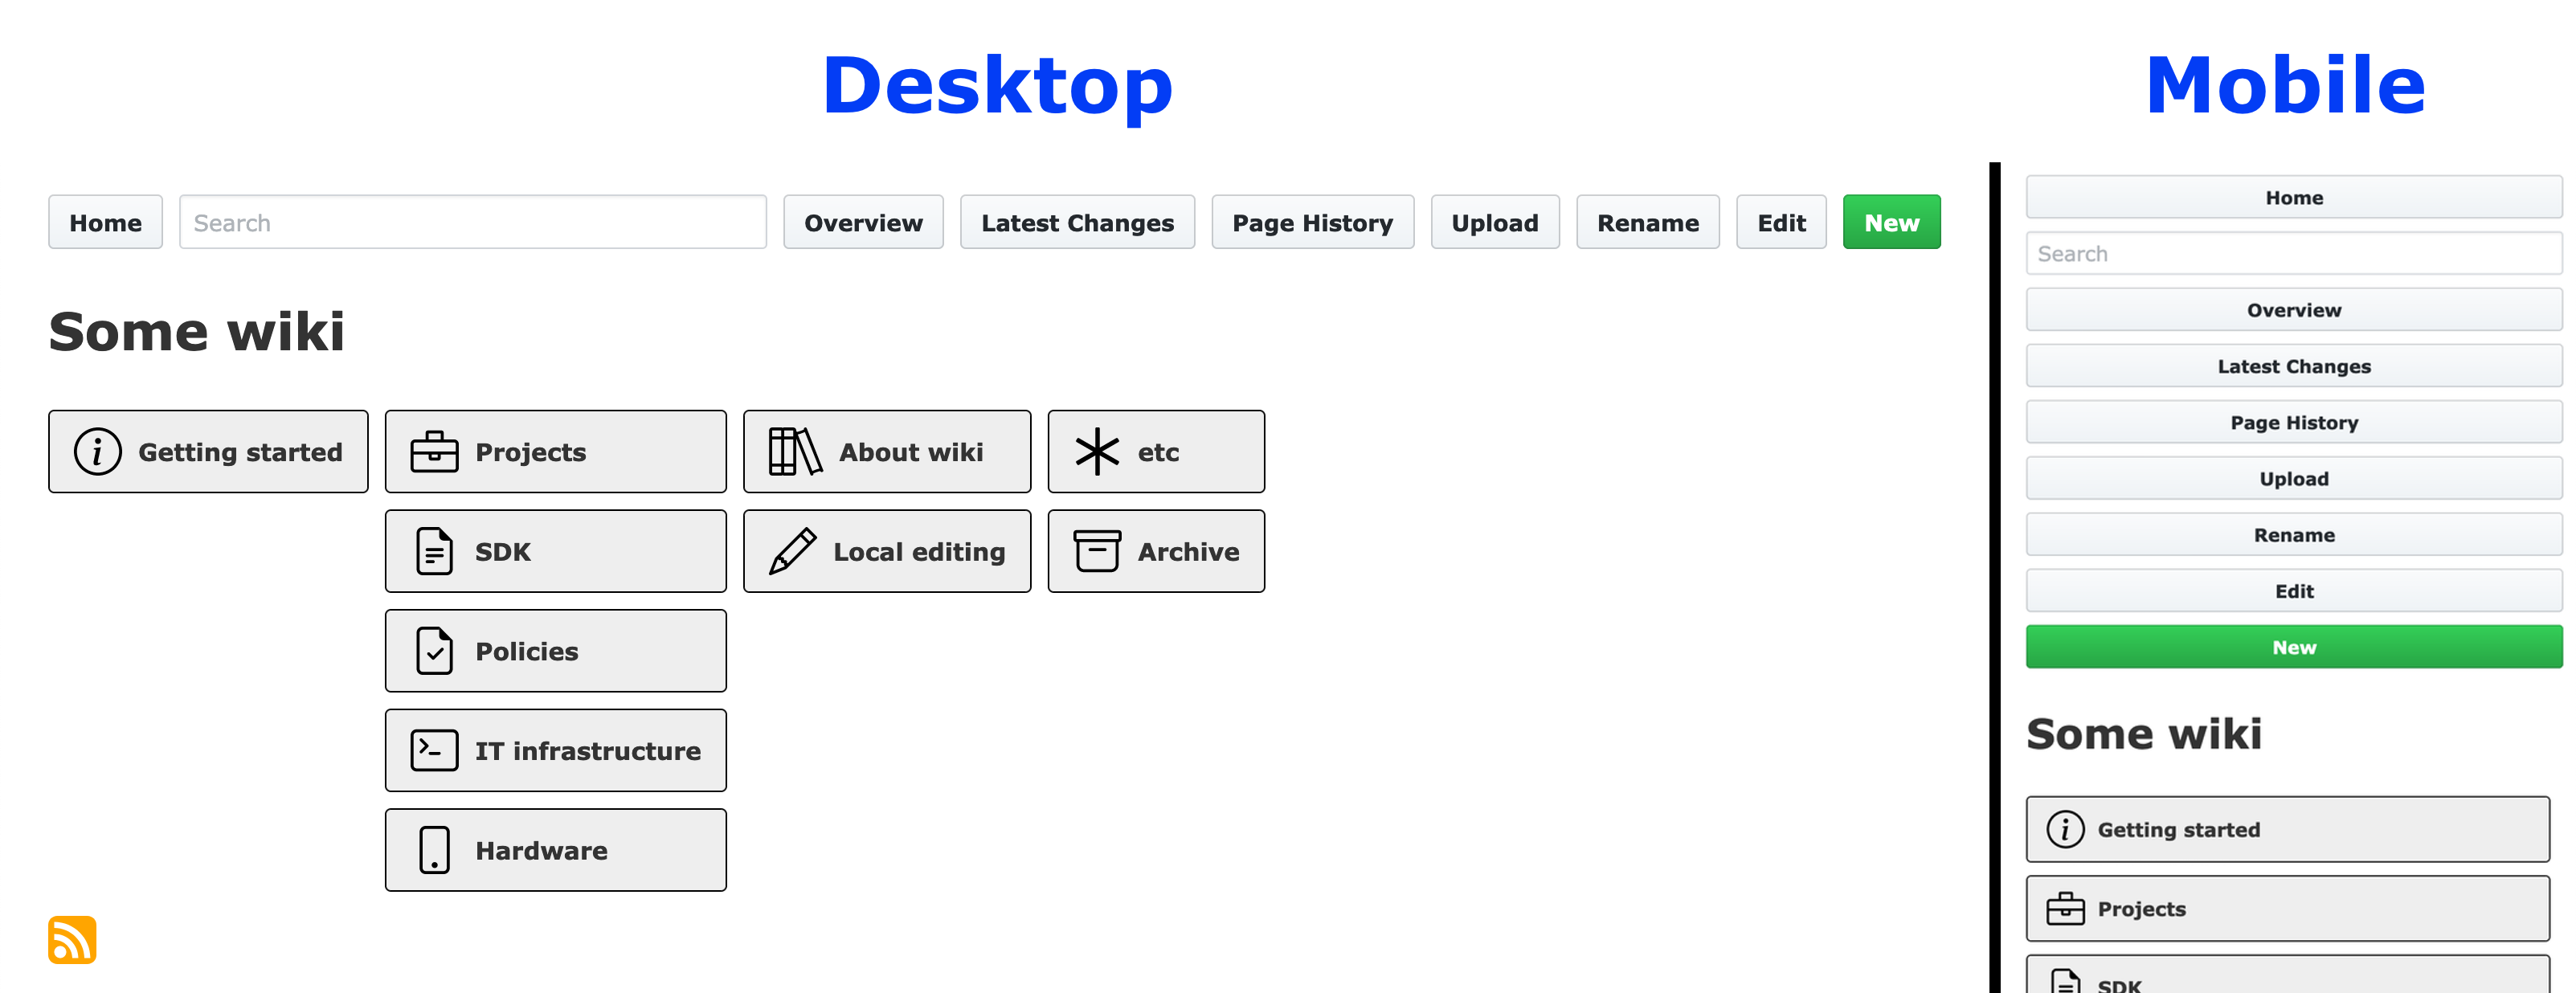
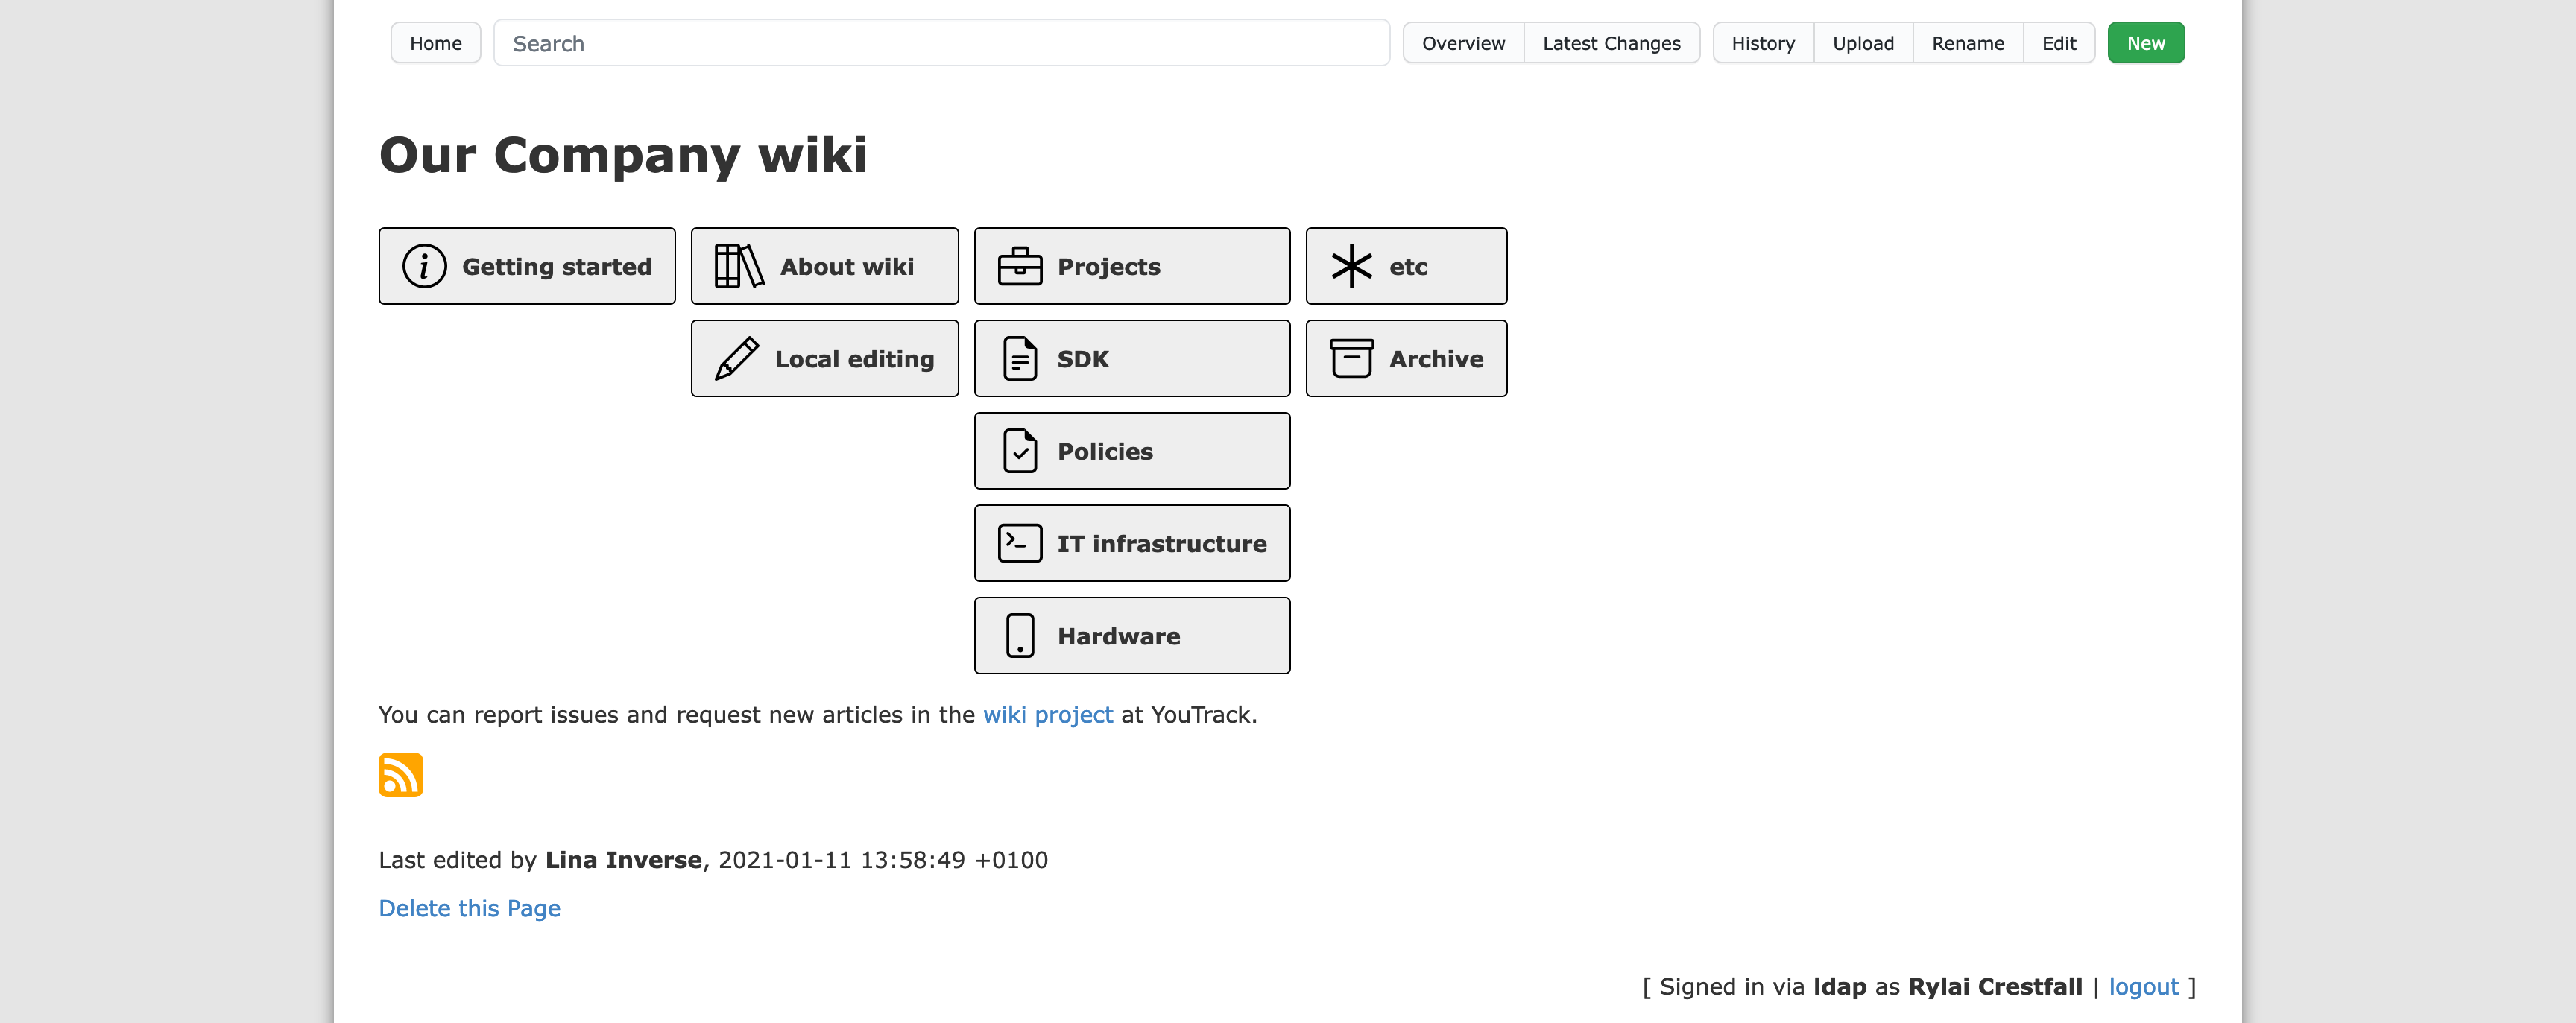
{:class="some-css-class"}As an example, our main page is mostly done with raw HTML. And thanks to injected custom styles, it nicely adapts to mobile screens:
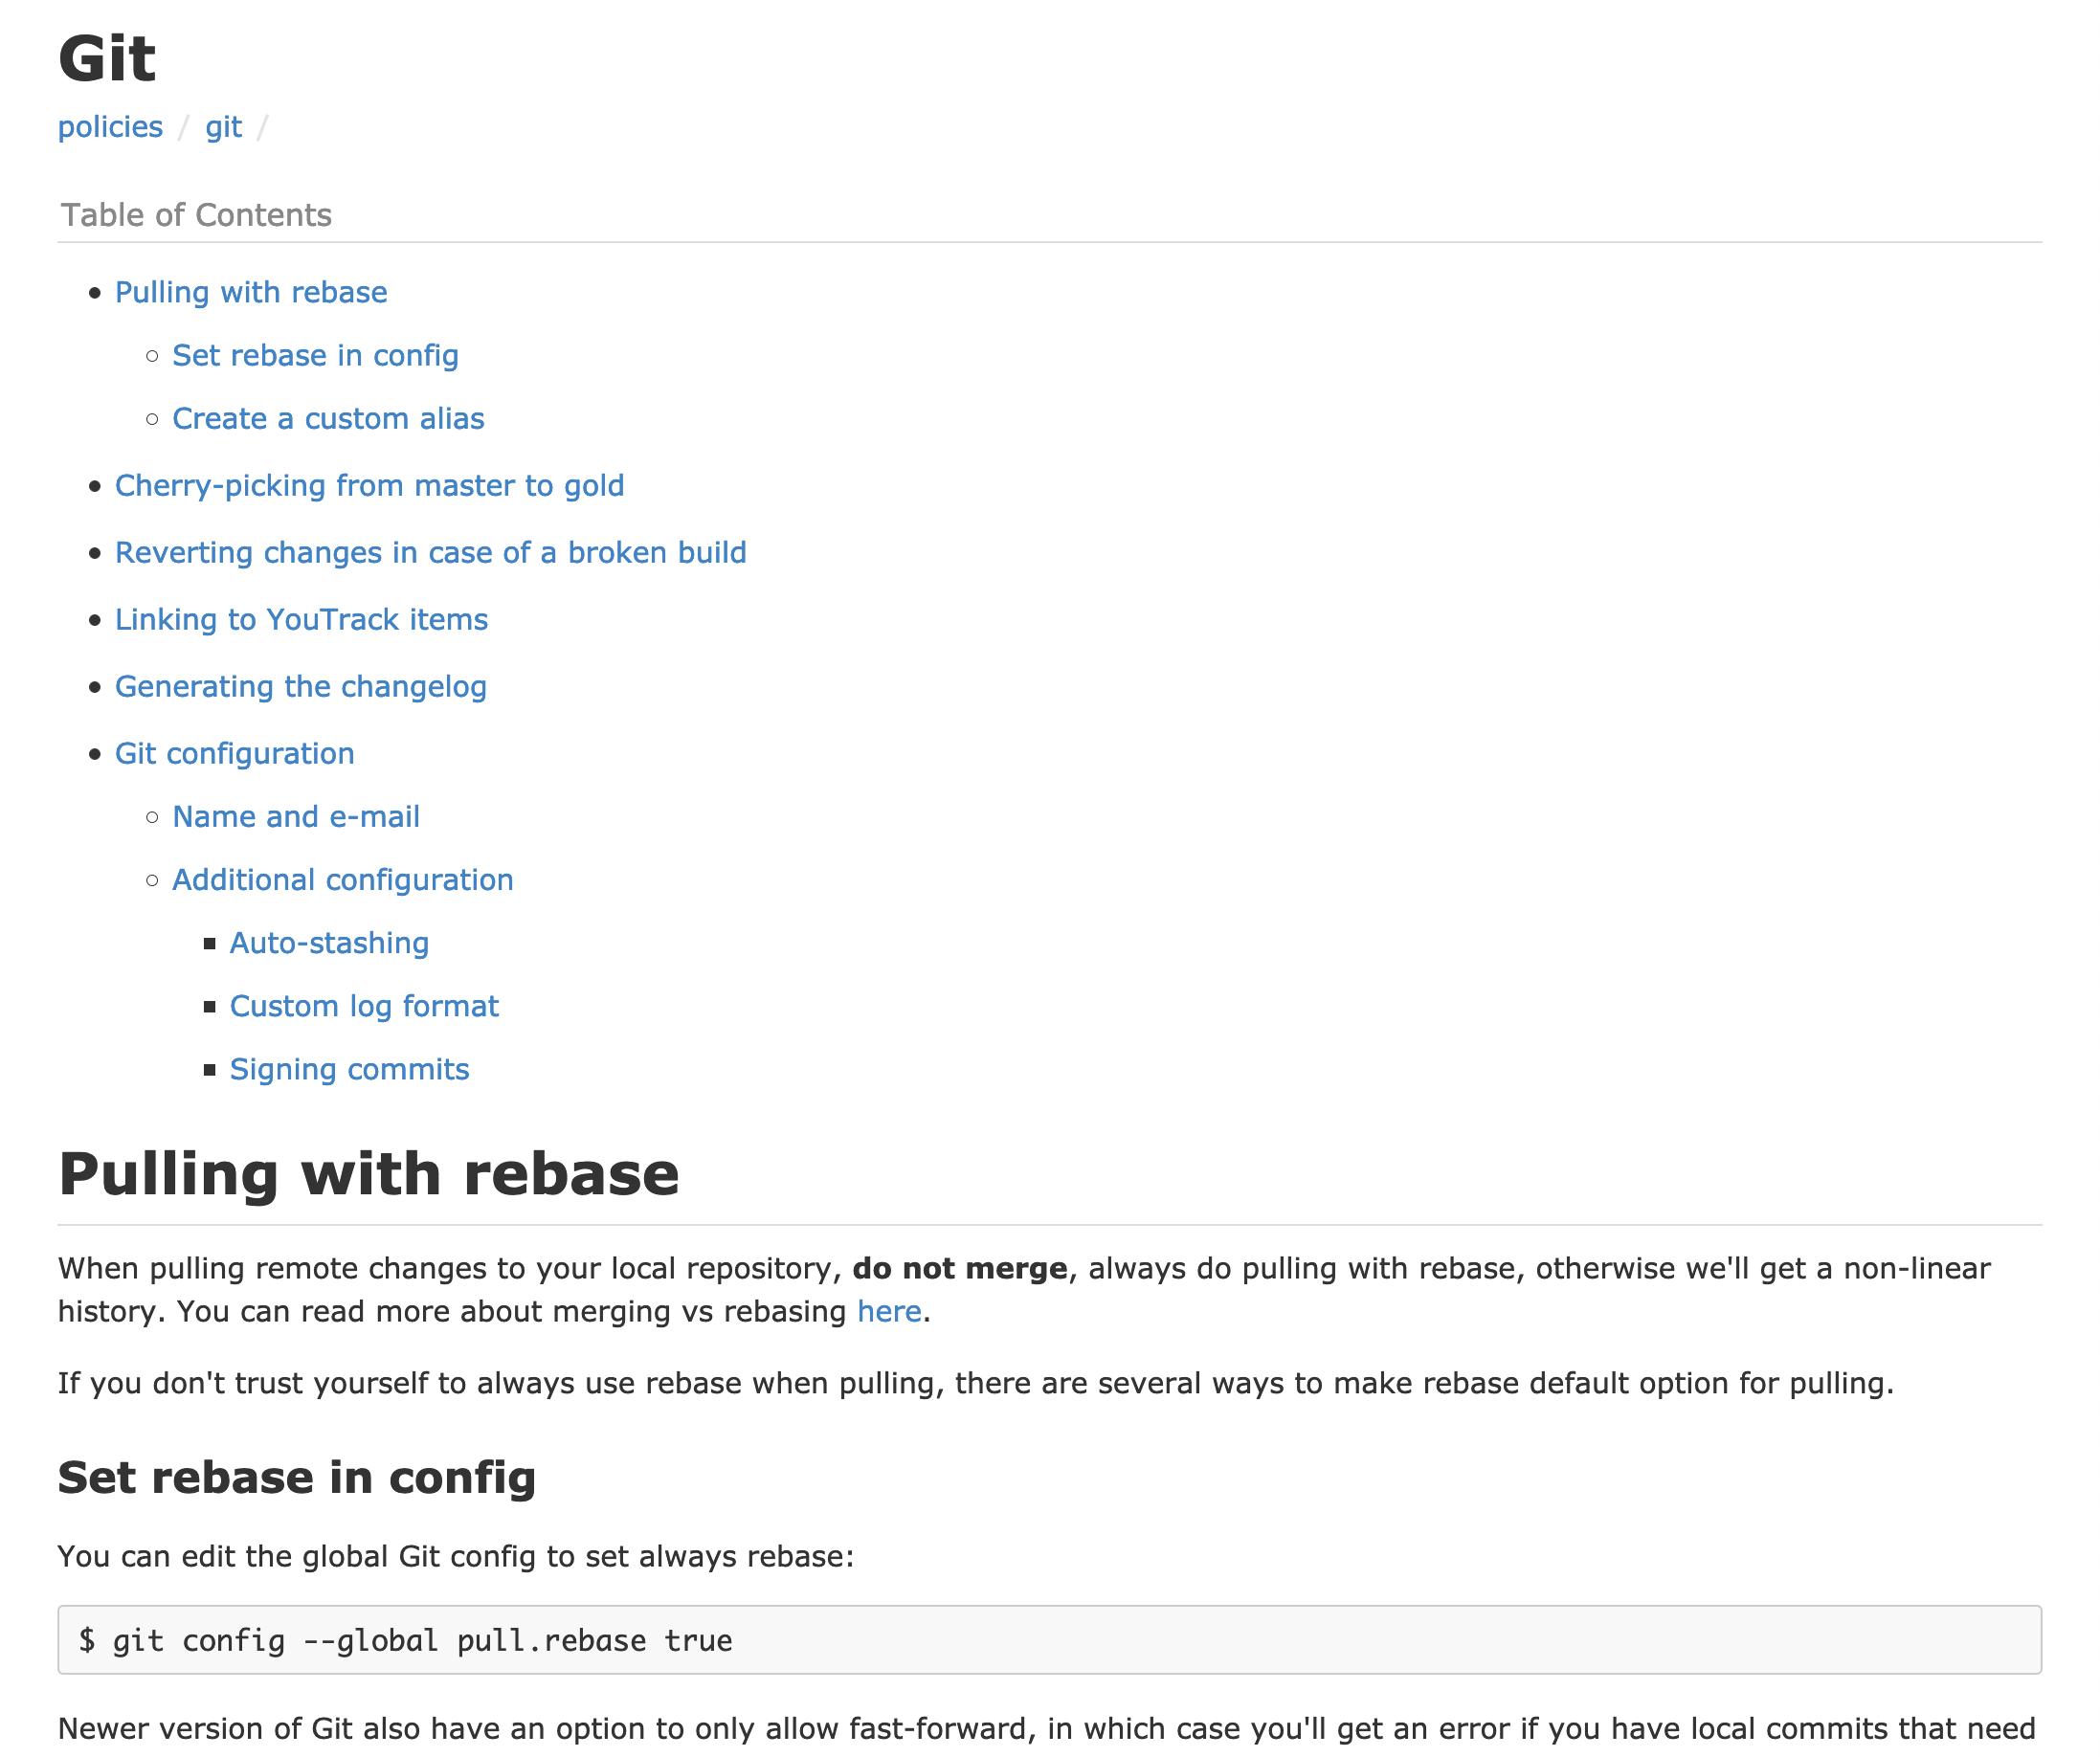
Also, default Gollum styles (at least, in older versions) define some rather ugly margins for ToC, headers, paragraphs and so on, but you can easily customize that into something nicer like this:
Note that by default both custom.css and custom.js are included in the <head>. If you would like to move your JS code to the end of <body>, you can do it by modifying the following template: /path/to/gems/gollum-VERSION/lib/gollum/templates/layout.mustache (or rather a copy of it that you made earlier).
But before starting to customize the hell out of default styling, make sure that you have the latest Gollum version. In our case we were on the latest version, but since the moment we did our customization for adaptive layout there were a couple of new Gollum versions released, and there default styling was already addressing that very same thing out of the box, so our efforts turned out to be a bit of a waste.
Header, footer, sidebar
There are certain special files (subpages) that get injected into pages - you can guess where exactly on a page by looking at their names:
_Header.md_Sidebar.md_Footer.md
You can use them for injecting some common blocks, such as table of contents (ToC). Here’s my _Header.md, for instance:
[[_TOC_]]These blocks affect all the pages in the current and nested folders, unless they are “overwritten” on lower levels. For example, I have an archive folder with its own _Header.md:
├── _Header.md
├── some-article.md
├── archive
│   ├── _Header.md
│   ├── some-old-article.md
│   ├── some-other-old-article.md
...
and it has different contents:
{:class="archived-banner"}
[[_TOC_]]so, aside from ToC, all the pages in the archive folder (and nested folders) will also have a special banner.
A bit about features
Gollum has quite a number of features, and I won’t describe all of them, but I would like to highlight some, as they are easy to overlook:
- RSS feed - available at http://wiki.your.host/gollum/feed/ (note the trailing slash)
- TeX math equations via MathJax
- YAML frontmatter - much like in Jekyll or Octopress. You can use it to set the page title (and other metadata)
- Overview - a service page that allows you to navigate the wiki directory tree. Available at http://wiki.your.host/gollum/overview
- Macros (full list is here), including custom macros
- Global ToC - you can add
<<GlobalTOC()>>macros to the main page and that will generate a list of all the wiki pages (unlike Overview, this will list only content pages)
- Global ToC - you can add
LDAP authentication
If the average technical level in your team isn’t very high, so not everyone is capable of setting-up an SSH connection and working with a Git repository (let alone signing commits), then you will likely have to enable editing via web UI. One other reason for why you might want to do that is to allow people to make changes in the wiki from their mobile devices, where it isn’t trivial/possible to work with a Git repository.
But then you’ll face the problem of authoring the changes, because without authentication all the changes will be authored by the default user that is set in Git config on the server, making it impossible to track who changed what.
One of the authentication options is to use LDAP. Below I’ll provide instructions for Active Directory, but as I already mentioned in the other article, different servers have different specifics, so you’ll likely need to change some things, if you are using something else.
Before doing anything with Gollum, check that your LDAP server is available and you can communicate with it from the host where you are running Gollum.
Setting up omniauth in Gollum
Thanks a lot to this beautiful person for describing the procedure. Here’s also another good tutorial.
First you need to install some more packages:
$ gem install omniauth
$ gem install omniauth-ldap
$ gem install omnigollum
$ gem install gollum-rugged_adapter
Then add the following in your config.rb after the Gollum’s initialization:
# Gollum initialization/settings
# ...
Gollum::Page::FORMAT_NAMES = { :markdown => "Markdown" }

# seems to be production by default, so no need to set it
#Precious::App.set(:environment, :production)

require 'omnigollum'
require 'omniauth-ldap'

ldapZone = 'com'
ldapDomain = 'our-company'
ldapSubDomain = 'ad'
ldapHost = "#{ldapSubDomain}.#{ldapDomain}.#{ldapZone}"
ldapQueryBase = "DC=#{ldapDomain},DC=#{ldapZone}"

options = {
  :providers => Proc.new do
    provider :ldap,
      :title => 'Your Active Directory credentials for the company domain',
      :host => ldapHost,
      # your LDAP server's port
      :port => 3268,
      :method => :plain,
      :base => ldapQueryBase,
      # your LDAP server's attribute for the unique ID
      :uid => 'sAMAccountName',
      # this filter query is for Active Directory, so you might need to adjust it
      # for your particular LDAP server. The `CN=crew` means that user must be
      # a member of the group named `crew`, so in your case it will be something different
      :filter => "(&(sAMAccountName=%{username})(memberOf=CN=crew,CN=Users,#{ldapQueryBase}))",
      # service user credentials (someone needs to query the server, preferably not a real user)
      :bind_dn => 'SERVICE-USER-NAME',
      :password => 'SERVICE-USER-PASSWORD'
  end,
  :dummy_auth => false,
  :protected_routes => ['/*'],
  :author_format => Proc.new { |user| user.name },
  :author_email => Proc.new { |user| user.email },
  # https://github.com/arr2036/omnigollum/issues/42
  # any AD user, who is able to authenticate, will have access
  :authorized_users => nil
  # otherwise you can further restrict access to an explicit list of your AD users,
  # for example via an environment variable (OMNIGOLLUM_AUTHORIZED_USERS=alleria,luna,mirana)
  #:authorized_users => ENV["OMNIGOLLUM_AUTHORIZED_USERS"].split(",")
}

Precious::App.set(:omnigollum, options)
Precious::App.register Omnigollum::Sinatra
This is it, nothing else is needed. Well, obviously except for enabling HTTPS in your reverse proxy, so passwords wouldn’t be sent in plain-text unencrypted.
You can now run Gollum as usual, just add --adapter rugged parameter (not sure if this is actually required, as it seems to be the default one anyway):
$ gollum --config config.rb --host localhost --adapter ruggedTrying to run that, I got the following errors (first on Mac OS and then also on GNU/Linux server):
/opt/homebrew/Cellar/ruby/3.2.2_1/lib/ruby/3.2.0/rubygems/specification.rb:2295:in `raise_if_conflicts': Unable to activate omniauth-ldap-2.0.0, because omniauth-2.1.1 conflicts with omniauth (~> 1.8.1) (Gem::ConflictError)
    from /opt/homebrew/Cellar/ruby/3.2.2_1/lib/ruby/3.2.0/rubygems/specification.rb:1424:in `activate'
    ...
<internal:/opt/homebrew/Cellar/ruby/3.2.2_1/lib/ruby/3.2.0/rubygems/core_ext/kernel_require.rb>:148:in `require': cannot load such file -- omniauth-ldap (LoadError)
    from <internal:/opt/homebrew/Cellar/ruby/3.2.2_1/lib/ruby/3.2.0/rubygems/core_ext/kernel_require.rb>:148:in `require'
    ...
To resolve this I had to uninstall the newer version of omniauth:
$ gem uninstall omniauth

Select gem to uninstall:
 1. omniauth-1.8.1
 2. omniauth-2.1.1
 3. All versions
> 2
Successfully uninstalled omniauth-2.1.1
And then Gollum launched fine.
Filtering out disabled users
One minor but still important thing to note here is that current configuration will probably allow to authenticate with a disabled account too (if it is a member of the crew group). It should not, but still, it’s better to explicitly filter disabled accounts out.
There is an attribute that allows to do that - (!(userAccountControl:1.2.840.113556.1.4.803:=2)) - but adding it to the query/filter makes the query invalid, so it might be that there is something wrong with the syntax (exclamation mark needs to be escaped somehow?). It works fine in our other portals which use the same Active Directory server for authentication, so I’m puzzled about what could be different in this case.
Customizing authentication views
Trying to open any page in your wiki, you should now get the following authentication form (if you are unauthenticated):
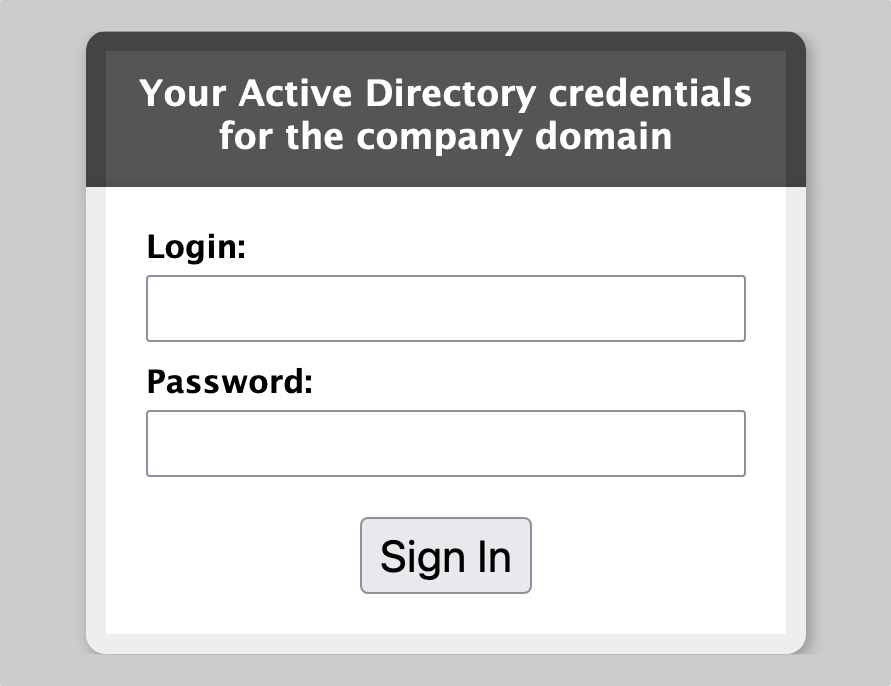
Which doesn’t look too nice, so I wanted to customize it, and I was hoping this could be done via templates, but sadly it looks like the only way to do this is by editing the omniauth/omnigollum gems sources, which means that you’ll need to do that again on the next update:
- /path/to/gems/omniauth-VERSION/lib/omniauth/form.rb
- /path/to/gems/omniauth-VERSION/lib/omniauth/form.css
- /path/to/gems/omnigollum-VERSION/lib/omnigollum.rb
- /path/to/gems/omnigollum-VERSION/templates/Error.mustache
- it is a template, but it has the same file name as the main error template, so it needs to be edited in sources (unless there is a mechanism for nested/scoped templates)
- also, this error page customization capabilities are rather limited, because it is just a
divthat is getting inserted into the main layout
I’ve settled with the following (reused login page styling from other portals, so it looked familiar for everyone in the team):
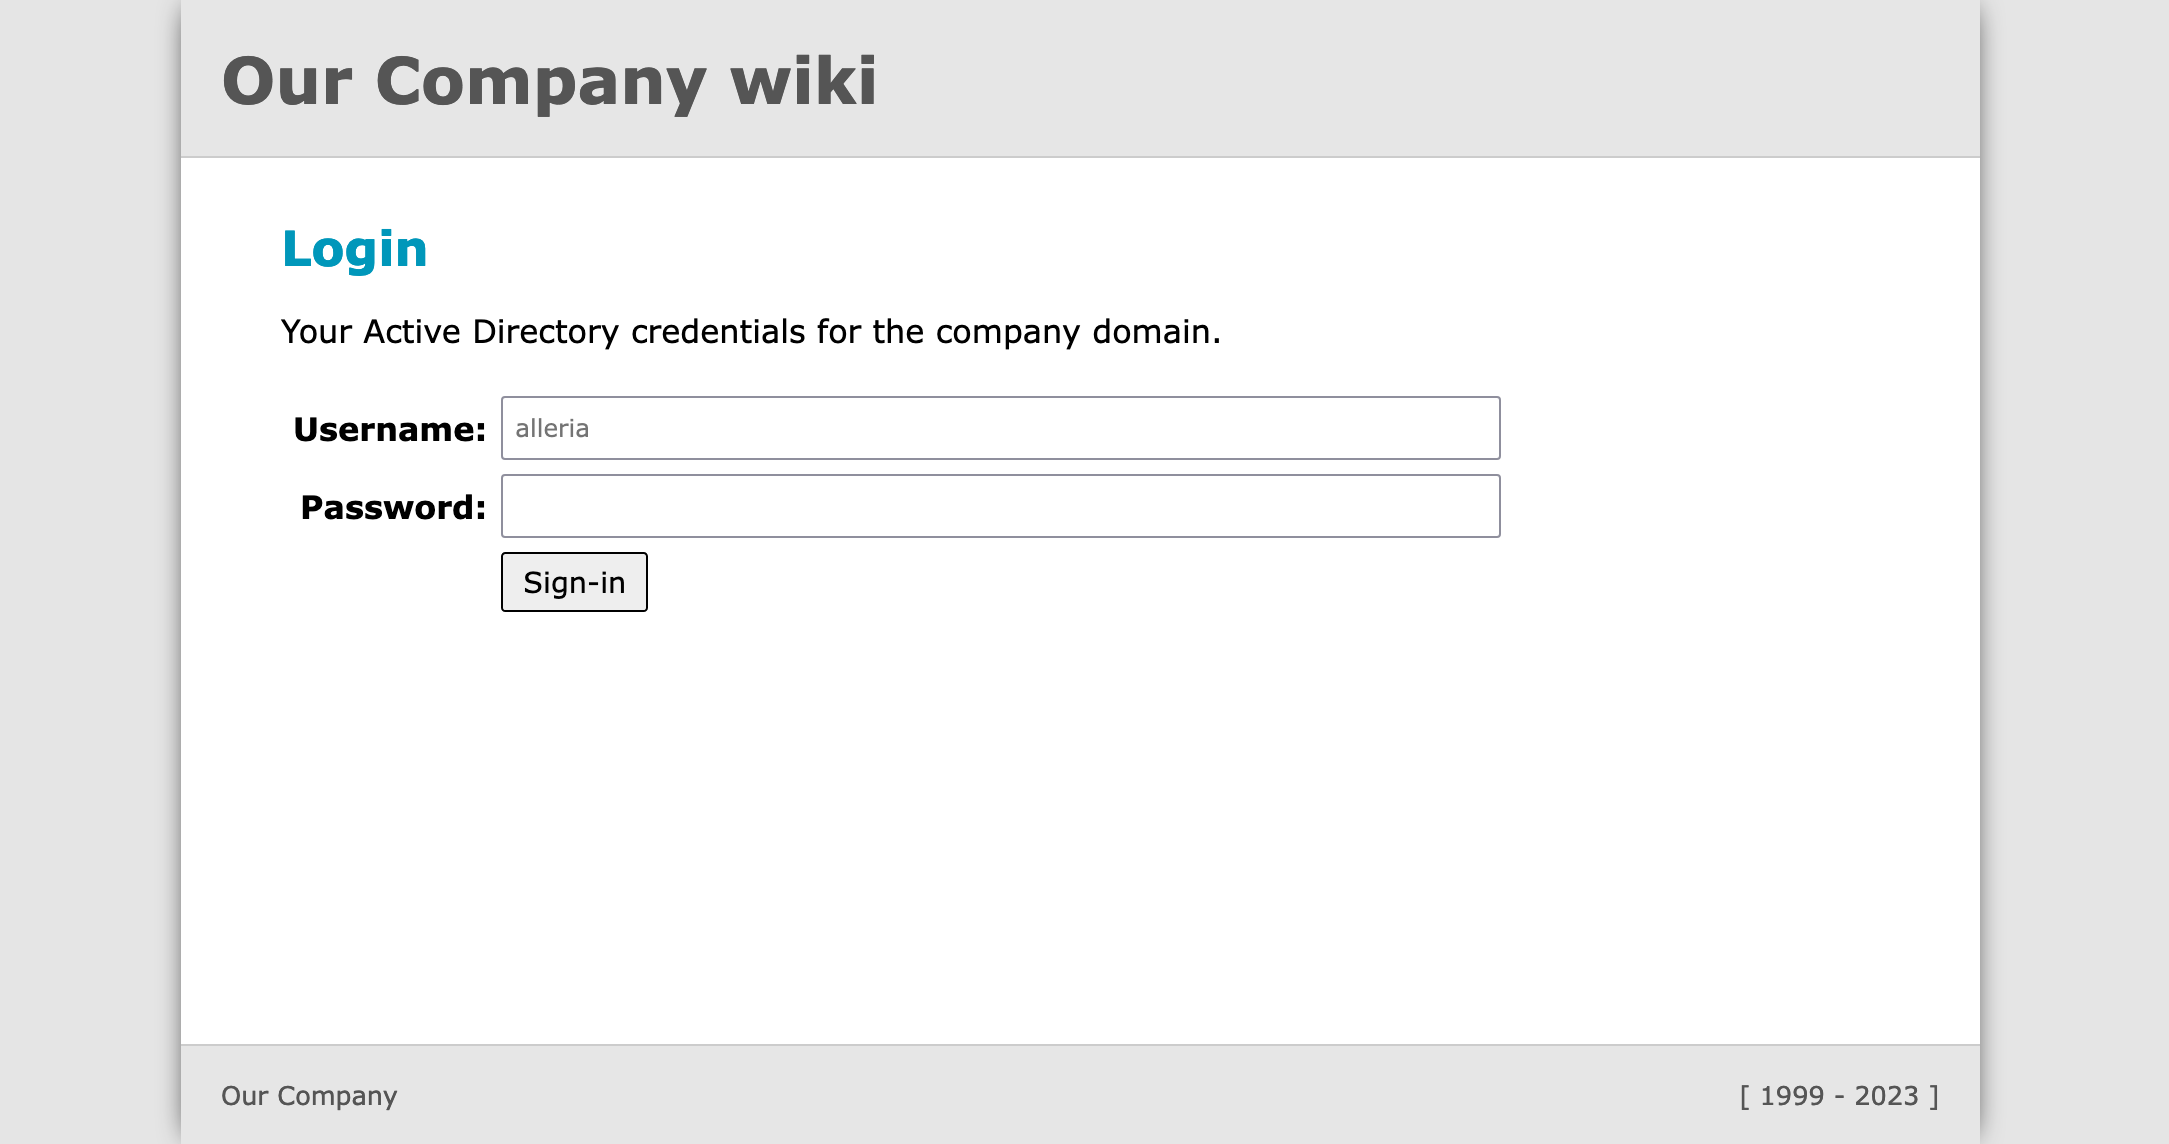
Better, innit.
Another thing you’d probably want to do is to show currently signed-in user. For that you’d need to create a new template /path/to/your/custom/templates/user.mustache:
<div id="user" style="float: right; margin-top: 30px; font-family: Verdana, sans-serif;">
    <p>
    {{#user_authed}}
      [
      Signed in via <b>{{user_provider}}</b> as <b>{{user_name}}</b>
      |
      <a href="/__omnigollum__/logout">logout</a>
      ]
    {{/user_authed}}
    {{^user_authed}}
      [
      You are not logged in
      |
      <a href="/__omnigollum__/login">login</a>
      ]
    {{/user_authed}}
    <p>
</div>
then customize the /path/to/your/custom/templates/layout.mustache (note the replacement of the < with < - I had to do it this way here in the article because of the Hugo limitation):
<div class="container-lg clearfix">
{{{yield}}}
{{< user}} <!-- replace `<` with the actual `<` symbol -->
</div>
</body>
</html>and finally edit the /path/to/gems/gollum-VERSION/lib/gollum/views/layout.rb source (which means that you’ll need to do that again on the next update):
# original sources
# ...

      # passthrough additional omniauth parameters for status bar
      def user_authed
        @user_authed
      end

      def user_provider
        @user.provider
      end

      def user_name
        @user.name
      end

    end
  end
end
Now all the changes made via web UI will be properly authored too. For example, here you can see who edited the page last time and which user is logged in at the moment:
And if you trust the omni* packages enough, you can now probably even expose your wiki to the big internet, so your team could use it without office VPN.
Unprotecting RSS feed
One sad drawback of enabling authentication is that RSS clients won’t be able to read the feed. A not so secure workaround for that would be to exclude the RSS route /gollum/feed/ from protected_routes in config.rb:
-  :protected_routes => ['/*'],
+  :protected_routes => [
+    /^\/(?!gollum\/feed\/)(.*)/
+  ],
However, by default Gollum will fail to start with this:
Feb 12 12:02:20 wiki gollum[2004919]: /var/lib/gems/3.0.0/gems/mustermann-2.0.2/lib/mustermann/regular.rb:41:in `check_anchors': regular expression should not contain ^: "^\\\\/(?!gollum\\\\/feed\\\\/)(.*)" (Mustermann::CompileError)
That check_anchors parameter seems to be configurable, and Sinatra documentation even mentions how:
:mustermann_opts => {
    :check_anchors => false
}
but I could not figure out where exactly in config.rb that should be set. So instead I just changed the default value in the original mustermann/regular.rb that is mentioned in the error message (which of course will get reverted on the next update):
-    def initialize(string, check_anchors: true, **options)
+    def initialize(string, check_anchors: false, **options)
Alternatively, I could probably come up with a different regular expression to exclude the /gollum/feed/ route, which wouldn’t rely on ^, but so far I failed with that too.